2016 Show & Sale will be the Saturday 14th May 2016 held at the Peachland Community Centre in Peachland BC. contact person Barb Janes-Yeo at 250-757-2842 barbandpaulyeo@shaw.ca
Well, by now, all chocolate rabbits have had their ears mysteriously bitten off, - which of course is the correct way to eat a chocolate bunny, as everybody knows - and all the brightly colored eggs have been found and accounted for. Well, almost. There is always that one egg that goes missing, right? I remember the phone call from my uncle, letting us know that one of the eggs had come home with him...in his shaving kit. We kids were blamed, but finding hidden Easter eggs is serious business, especially when there is a prize on the line for the most found, so there is just no room for shenanigans such as that - I suspect an Easter Bunny with a wry sense of humor did the deed, although we did have an exceptionally bright cat at the time as well, and I am not ruling her out either.
For me it was a fabulous Easter - I mean, just look at that basket above. There is enough in that basket to keep me going for some time, as long as I don't let my chocolate-loving friends and relatives in the door. What a difference a week has made too - the sun is out, it is warm enough to ride, and those who have been peering suspiciously out the windows for the past few weeks, desperately waiting for the weather to have a change of heart, are rewarded today with a quite unseasonably warm Easter. This is spring, the one my heart sang about when the bitter winds were whipping around my wool-covered person just days ago.
Easter Eggs, so Lovely
I worked a little on my Peddlar's Stall this week. I still have to find an awning, but it is taking shape. I think I may just have to print one up eventually.
Peddlar's Cart Painted
I chose a rather nice "Soft Apple" Green. Unless I told you (and I did tell you so that ship has sailed away already ) you would never have guessed that the bulk of this was matboard. Well, maybe you would - you have shown yourselves to be quite clever in the past about such things.
Antiqued Stall
More often than not, and unless it is a very unusually well-kept and proud Peddlar's market, the stalls get pretty roughed up, what with being exposed to elements plus accompanying dirt/mud, and also because if you give a spot for people to lean, they tend to lean (one of Newton's lesser known motion laws). Paint gets rubbed away, wood ages, and you get a well-loved patina, which of course weekenders love because of its "quaint charm". Makes one wonder if these stalls actually come this way for that reason too, but I digress. I also built a stand for the merchandise, which is a simple staircase build with risers and treads. I gave the stand the same treatment as the stall, and glued it down.
Having Some Fun
I don't know anyone who can resist the urge to "see how it might look" in the end, and that includes me, so I filled my shelves with my more festive bits of Easter that I had stashed in my various hiding spots. This will change much, but I just wanted to play. If you wonder where I got the little rabbit (and I know you were) I found that in a dollar store in a bag of generic plastic toy critters - you have seen them, the cow that in real life would be the size of a chihuhua, but the mouse is the size of a buick. However, occasionally you will spot that one gem among the turkeys (I have found turkeys too, for that matter). The daisies, which are a little early yet to be in an Easter tableau, were from a swap many years ago. The daffodils and Iris were left overs from kits I bought for my fairy garden a few years ago. I think the fresh eggs were a grab bag find. The Easter basket and decorated eggs were from past workshops that Member Rosemary taught. The hat was from a work shop that Member Marianne taught. Not seen so well were a little merry-go-round charm that I found at a craft store (honestly, go into the tween stores or the tween-themed areas of stores, I have found amazing charm bracelets and the like, not too expensive but certainly useful), and a blue chicken that I found on a chocolate cupcake, so kindly supplied by Member Sherrill at our last meeting - Honestly, I don't know if I was more excited about the chocolate cupcake, or the chicken on top, but so goes the life of the chocolate-loving warrior miniaturist with a predisposition towards barnyard birds, I suppose.
Easter Basket taught by Rosemary
Above is the closeup of my Easter basket project. There are jelly beans, a Peep, the requisite Chocolate Bunny, a decorated egg, and of course a little stuffy (made from pompoms).
Egg in a Box
I remember one of my peers very thoughtfully buying each and every one of his friends, including me, one of these eggs - I don't know if they still do this now, but at one point in time you could buy the hollow egg and they would personalize it with your name in icing. I am personally against hollow chocolate in general, as the chocolate to air ratio is alarmingly low (mind you, in a chocolate-related emergency, of course, we can't be choosy), but what a thoughtful lad he was to think of us.
Are you enjoying my nail polish, by the way? That was an Easter treat. You are probably also politely ignoring the bad paint job, and for that I am grateful.
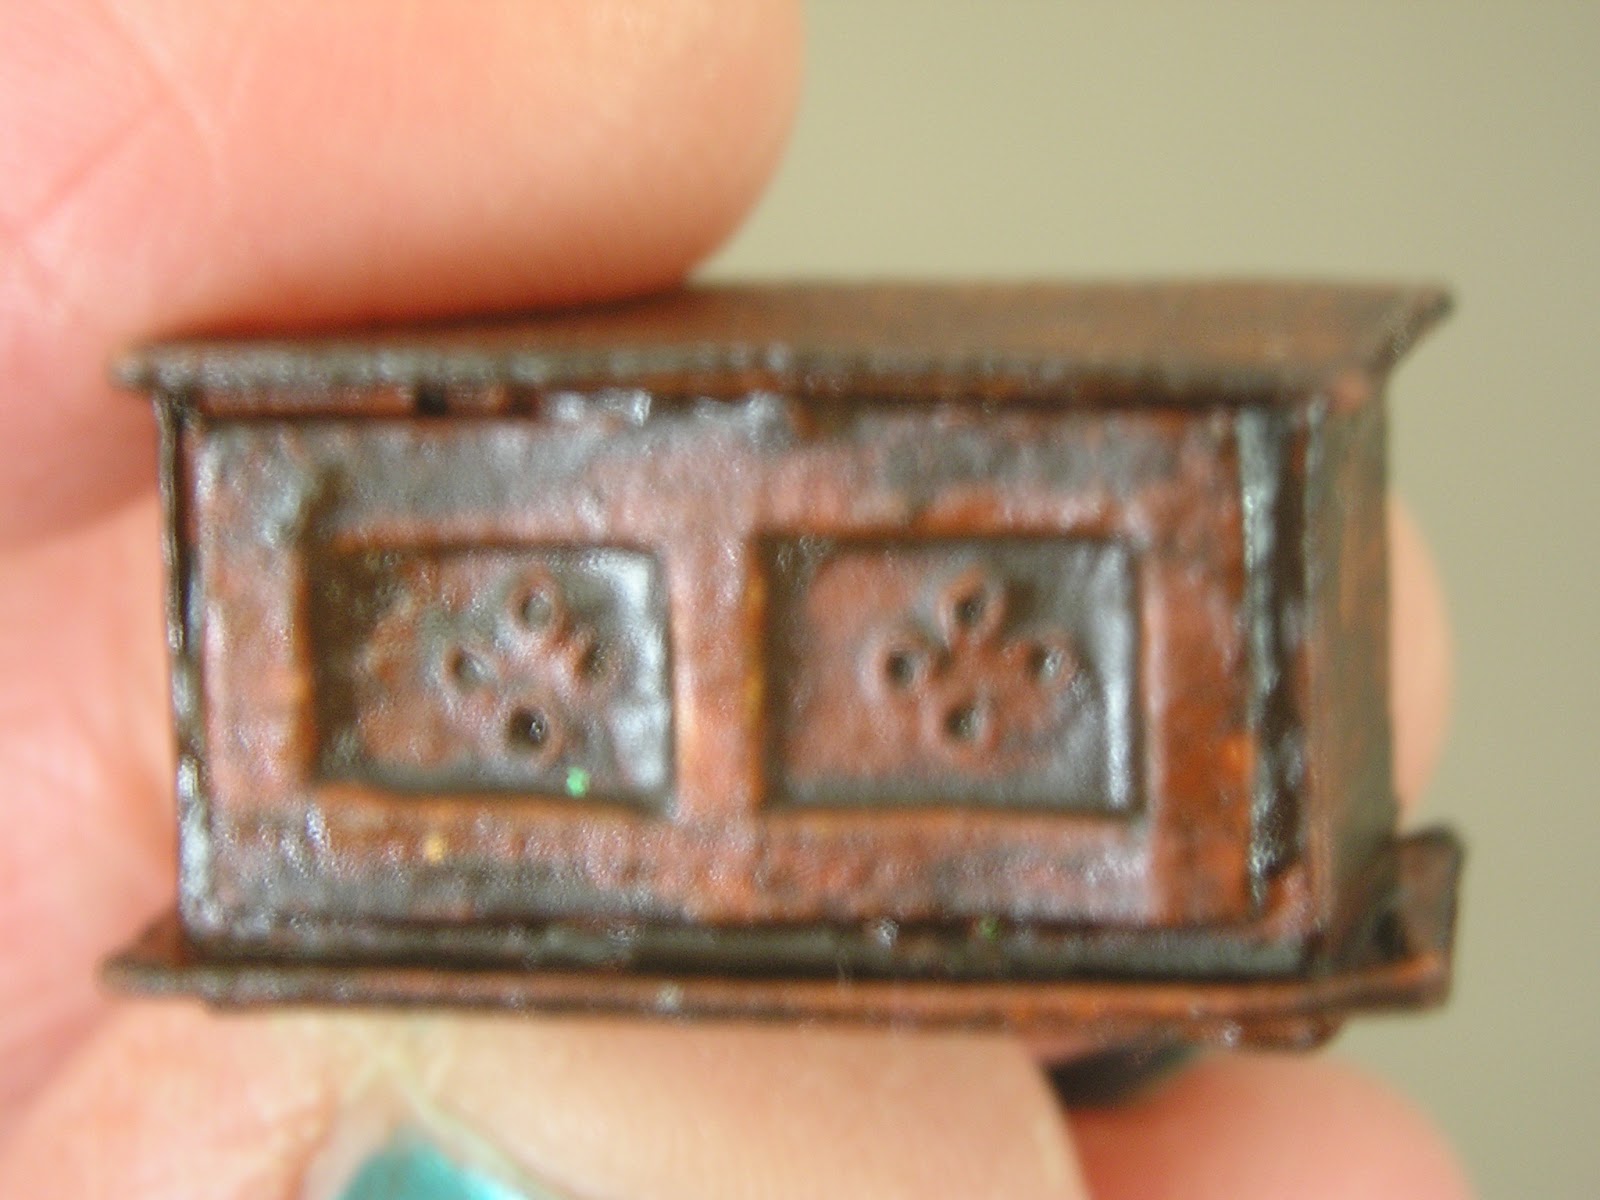
The Medieval Trunk
Detail of Trunk
As promised, a photo of the trunk that I made last week. I am really quite happy with the way these paint up, they look a lot more complicated than they actually were to build.
Today's Project
I continue my mission to try my hand at every project (or almost every one, still not keen on the beds) in my Fiona Broadwood books, in ultimate goal of the Washtub Cottage. Today I felt the need to make a dressing mirror.
Pattern Drawn
My first reaction today, when I read the pattern, was "no way" . The size seems dinky.
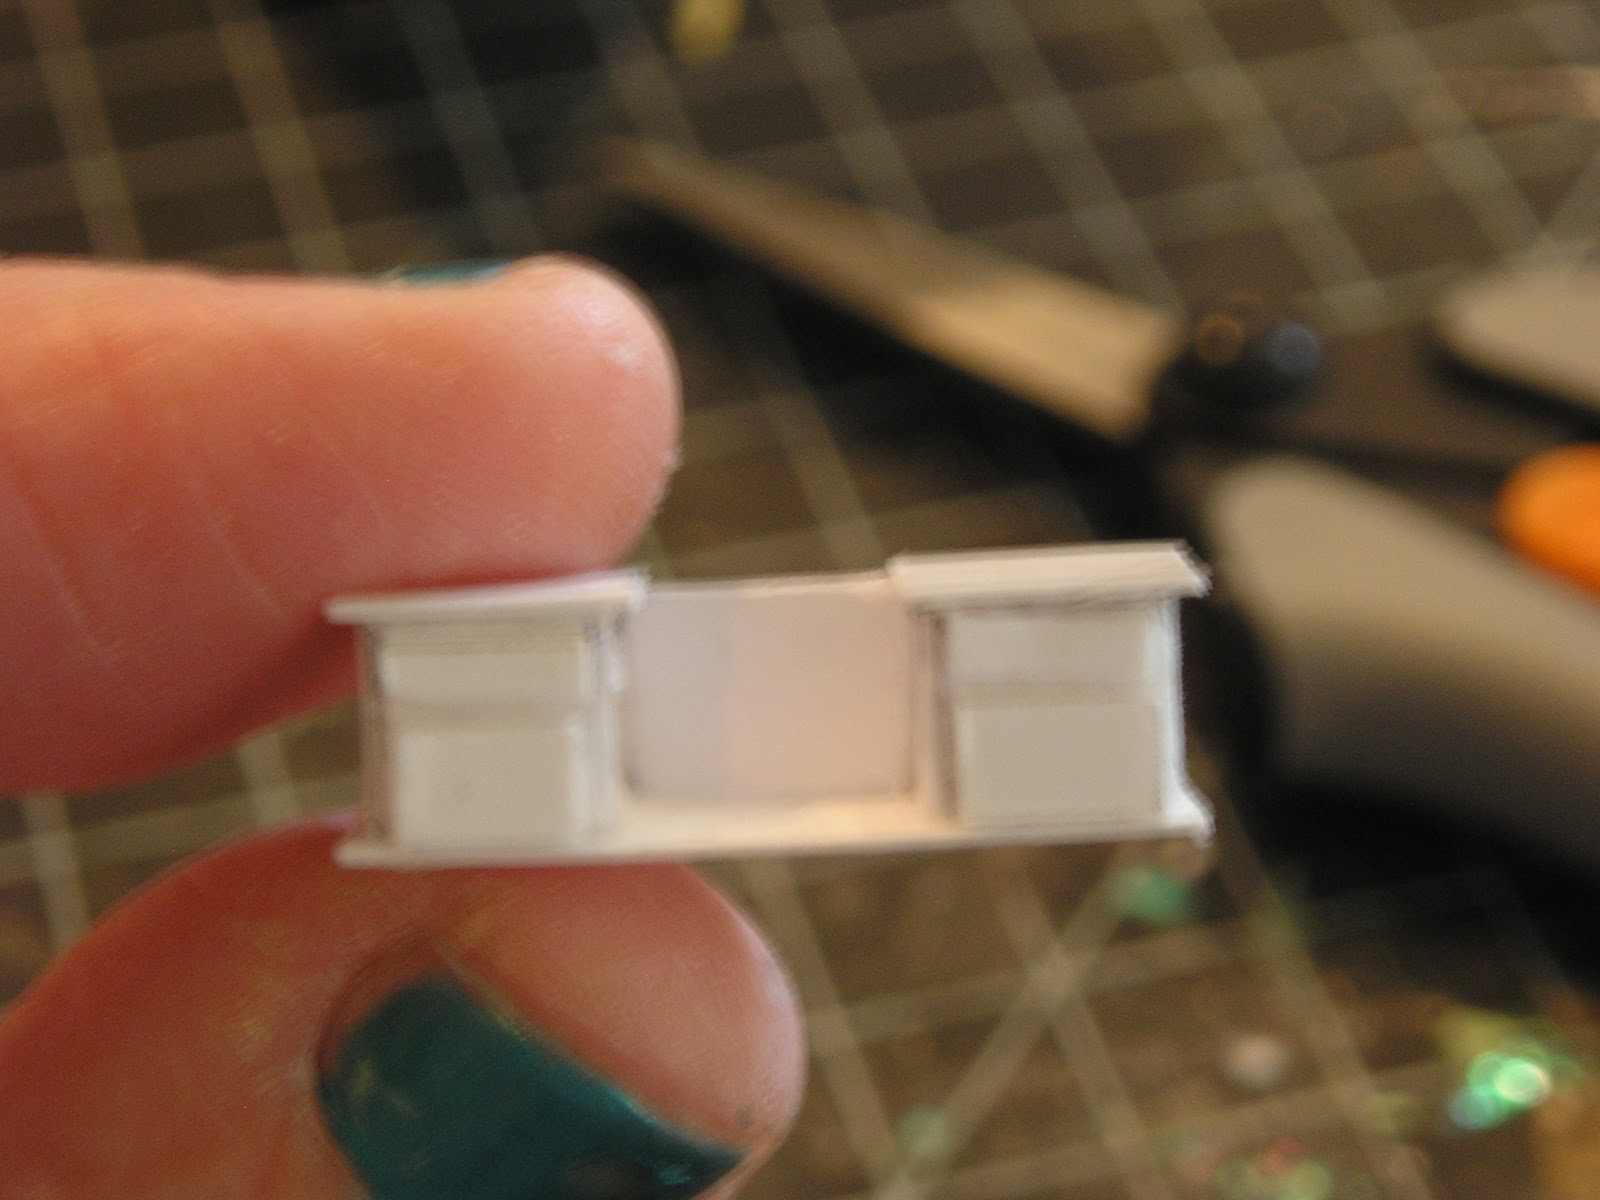
Top of Dresser Mirror
See what I mean? Ti-ny. Little. Miniscule. Dare I say, itty bitty. But I carried on, as one does.
Gluing the Base
The dresser mirror was very similar to the study desk done in an earlier post, except it is essentially "flipped" over.
Base of Mirror Dresser
Here I have gone ahead and applied the tops of the counters, as well as the drawer fronts. I seem to be getting better with those as well, yay me. There is overhang on all edges except for the back, as that has to be kept flush in order to apply the back of the dresser mirror.
Back of Dresser Mirror
I drew out the mirror, with cross hatching to show me where to cut. Since this is so tiny, I cut out the fiddly bits first, then cut the rest away from the paper. You might do these things differently, but for me this reduces the frustration levels, and the potential accidents that happen when your fingers are obstructing your view between project and blade.
Dresser Mirror Base and Back Assembled
It is starting to look like the picture now! That is always a good sign.
The Mirror Front
The mirror was two pieces, the front frame, and then the mirror proper. Again, I drew the pattern out, and cut all the fiddly bits first before excising it from the main paper. The frame sides are all of 1/16 of an inch, so in this instance one can really see what kind of anguish it could cause if the centre cut out was left to the end.
Mirror Frame Cut
Look, the queen is totally agog at my mad skillz with the blade! I was going to make the mirror more rounded, but I went a little more gothic with my mirror frame because I just liked how it looked.
Painting the Bits
As there is going to be a mirror added in eventually, it is better to pre-paint the pieces. The pattern calls for medium card for some of the backing and the frame, so I would suggest - depending on what kind of finish has been applied to your medium cardboard (cereal boxes, etc., will be shiny) - to give it a quick buff with an emery board, just to rough up the surface. Otherwise, the paint won't stick well.
Mirror
To make the mirror, I drew out the pattern, cut it out as before. For the mirror, I just used a piece of aluminum foil. Once the glue was dry (yeah, right, like I ever wait for that) I applied the frame, and I added a bit of Triple Thick varnish into the mirror to give a bit more thickness and smoothness, and less like I just stuck a piece of tinfoil down.
Also Known as "Drawer Pulls" today
Instead of my glass beads for drawer pulls, I found - at long last - micro beads (formerly known as holeless beads, but by putting micro in front of something, you can charge more - true story). I found two colors - the so called "champagne" colour (I say gold, but whatever) and a silver color, but apparently there is a rainbow pallette available of the beads for those at Hogwarts willing to look. I understand they are to "add texture" to cards, although in the world of miniatures of course, they become eyes, cookie and cake accents, drawer pulls for micro-minis, ornament decorations, perfume bottle caps, etc. They are so small they don't come in a count but in a weight, so be careful with them, this is glitter with attitude. I understand Martha makes some too, so if you can't find this brand, they are around under other banners. Black would actually be a very handy color, but the trick is, of course, finding more than the standard gold (s'cuse me, "champagne") and silver in stock. Probably a better bet for color choice is at a scrapbooking store, but that would have involved me thinking of that yesterday when I was hunting these little treasures down.
Mirror Dresser with Microbeads
Once again, I went after my furniture with my gold pen, added those lovely "champagne" microbeads for accents. Spiffy!
Another View of the Dresser Mirror
Back of Dresser Mirror
You can see what I mean about that glossy cereal box (well, okay, admittedly it was a coffee box) not playing nice with the paint. I will have to go over it again with a second coat. I did use the glass beads for furniture feet, which I painted gold (no, no, this time, it was gold...!). I left the mirror back a lighter color, as I always remember these mirrors being a different color to the rest of the piece - be it cheaper wood, or because no one finishes the back as nice as the front.
A Closer Look
I do like how the paper actually curved out on the sides, like I had actually meant it to do that. Honestly, if I had tried for that effect, I doubt it would have come together as nicely.
The Furniture So Far...
Twelve pieces of furniture have been made (every last one of you is counting, aren't you...). Some of it, we will see if it can be used in the same setting or not, because there is quite a variation in size. Overall though, I am still liking Fiona's patterns, and with a little tailoring certainly any piece could be modified if someone (me) felt the need to do so.
Well, I think we can count this day as seized. Hope your Easter was a most lovely day, and we will talk again soon! In closing, a little Easter basket Tutorial, brought to you by the fine people of "On A Finer Scale" ... Enjoy!
Happy Easter, with a little taste of Summer to Come!
"The March wind roars
Like a lion in the sky,
And makes us shiver
As he passes by.
When winds are soft,
And the days are warm and clear,
Just like a gentle lamb,
Then spring is here."
- Author Unknown
This week heralded the first day of spring.Supposedly. Now, I am not saying the calendar is an out and out liar, but how am I supposed to work with snow almost every day this week and below freezing temperatures? Not to mention, it was nearly -10 C each morning of my very short weekend...I couldn't even get out to ride. I was getting more cycling action when it was still winter. I have to say, my fancy was turning less to thoughts of love and more to my very warmest set of fleece jammies and a hot cup of cocoa. Today, at least, there was a little bit of a redemption of the first week of spring with a shot of embracing promise of better days to come, but once that sun started to set, wham! The poor birds were freezing out of the trees again. The weather has been so very angry and agressive, it is no suprise to me that the month of March is actually named after the Roman God of War.
The happy news is, I have completed my Valentine's Day box. Admittedly, it is enough sweet to rot your teeth/put you in a diabetic coma, and make a 7-year-old girl just giddy with glee with all the pink and cliche cute contained within its tiny little pink walls, but I am happy with how it all turned out.
Pink Exterior
Kitties and Bears, n' Teapots, n' B'loons 'n EVERYTHING!!
Little Mood Lighting
I think Valentine's Day has been very much seized for 2013, don't you?
I also worked on my quarter scale furniture for my Washtub Cottage. I made a medieval chest.
The Pattern Drawn Out
I began as I do with drawing out the pattern. I find as I make more and more of these, I am getting a little more skilled. I should be quite the Quarter Scale Engineer by the time I hit the Washtub Cottage proper.
The Pattern Drawn for the Detailing
The chest gets its detailing from an overlay of a second piece of cardstock, in which key sections have been cut out. This gives an element of depth and weight to the overall appearance.
Overlay and Ventilation Holes
I actually followed the instructions this time - I know, I know, that I was getting ill was my first thought too, but no. I just have just lost my head for a moment. Anyway, the ventilation holes are merely pin holes pushed through in key spots.
Adding the Base
Once the box was put together, of course, I added a base, same way as we have been all along, gluing to a piece of medium card and cutting carefully around the bottom - hmm, that sounds rather like a Beverly Hills Reality Show about plastic surgery, doesn't it?
Ready To Paint!
Strangely, I did not actually take pictures of the painted piece. I used a burnt sienna as an undercoat, and then with my burnt umber water colours, I went over it and gave it a nice burnish and it is really effective in the picture you can't see. I was more careful this time with the acrylic gloss - less of it, and not using my big expensive jaras my dipping in reservoir, as to preserve the clarity of my varnish. I will take a picture and add it to the "finished" pile here next week.
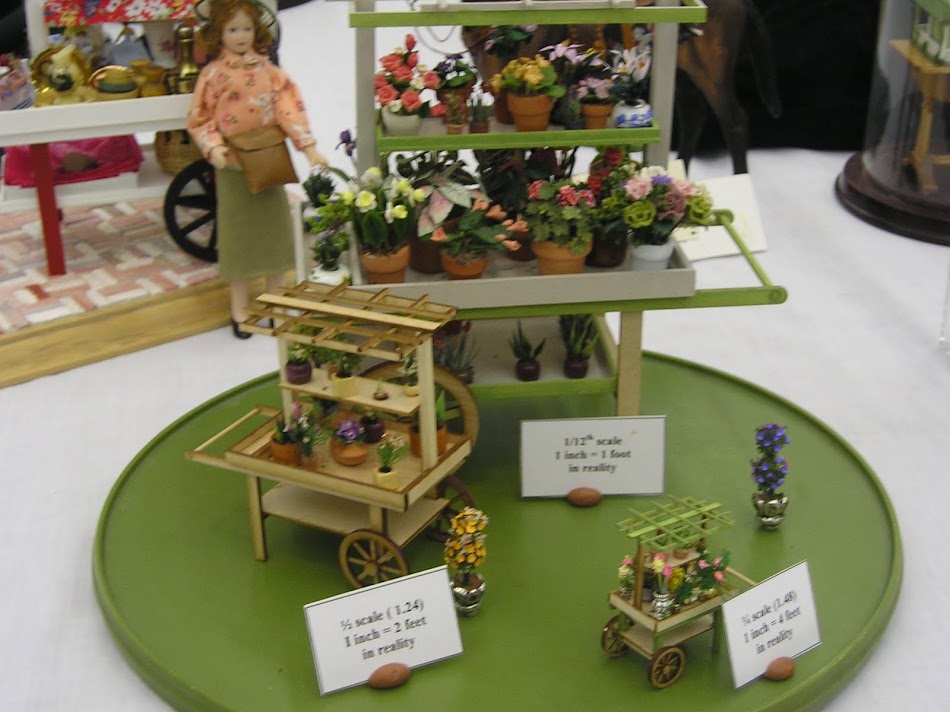
As it is Easter coming up next week, and as today's club project was a Lily, I went really insane and did a 1:12 scale market stall...or started one, anyway. It is really strange to do a 1:12 scale anything after working in half scales and quarter scales, everything seems so...mutant. I drew inspiration from Joanne Swanson once again, that wonderful, wonderful lady to whom I owe so many happy hours in my miniature life.
From Joanne Swanson's Blog
...And you thought you were safe from overly cute once I got the Valentine out of my system, didn't you? Nay, I say, Nay. I haven't done an actualEaster tableau, but I have been getting a small but steady collection of Easter-y things, and I have also wanted to do a market stall for awhile now. Bazinga! (If you are a "Big Bang" fan, you get the reference, if not, tough for me )
The Raw Ingredients
As with all projects, we start with our basic cut outs. I would suggest, because it is a 1:12 scale project and it is built primarily out of matboard, that a heavier blade be used. Exactos are nice, but box cutters do a better, safer (see below) job in this instance.
Building The Box
The box is built in a fairly standard way - you want your "facing" side to have an uninterrupted look - i.e. the edges of the side pieces are hidden. You don't have to do this, but it just looks neater and more finished.
The Box with Top and Bottom in Place
I realized too late that I either measured wrong, or I was supposed to have a "lip" coming over the edge because the top and bottom piece (cut to the same dimensions) were a little too proud over the front. I compromised, shortened the bottom so it was flush, and let the top hang over a bit. I think this is more in keeping with an outdoor event table.
Framing Out The Front
Originally, the plans called for a lot of fiddly woodwork, which got tiresome within about 3 seconds - some days I just don't have the patience, I swear! I took a page from my quarter scale medieval chest treatment, did some math and made cut outs. I did this for the two short ends as well, but left the back plain, as you don't generally see the back of a sales booth looking too overworked, mainly because the person you want to impress is standing in front of the booth, not behind it.
Package of "Project Wood"
If you did want to get frisky with the wood detailing like I didn't, sometimes you can find very usable pieces in bags such as these at the craft stores. Be aware, though, that sometimes the ends are not as true as you would hope, so make sure you are squared up before you start gluing.
Mitre Box and Saw
I find the above marvelous for the thicker pieces of milled hobby wood that would reduce my mitre scissors to tears. If you are looking for one of these marvels, make sure the razor saw has a fairly wide blade. I have two saws, one of which is very thin - and very useless. The saw above gives me more stability. Of course, any bigger pieces of wood should be handled with a larger saw and even larger mitre box. However, you do have to remember with anything cut with a regular sized mitre box and saw, you will lose a certain amount of board to wastage due to the thickness of the blade, so always take that into account. As well, the bigger saws have bigger teeth, and may not give you the surface you want in the end, so reserve the big tools for big cuts you just can't make in a small hobby-sized mitre as above.
Supports for Base of Booth
I made a simple support for the base, again hiding the vertical boards with a longer horizontal face board. I decided to leave the back open, so my miniature people had space to push their feet under - comfort is always important, even if you are 5.4 inches tall with glass toes.
Top Supports
The supports to hold the canopy are pretty basic, the classic "H" shape.
Canopy Supports
To make these canopy support pieces, I drew a rectangle first, which of course will fit between the support posts and is an inch high in the middle. I found the centre point of the length, and measured out from that at the top to get my short side, and drew a horizontal centre line from the half-inch measurement Joanne gives in her instructions. From that center line on the edge, I drew a diagonal line to the top where the shorter edge ended. That way I had everything centred and ready to go for cutting. Ah, Math, is there anything you *can't* do?
Canopy Support and Side Supports, Together At Last
Our pieces, now expertly cut, they are glued to the posts.
Getting there!
The posts attached to the base.
With Top Shelf and Face Board
I added the top shelf and face board to dress it up. It is ready to be painted and decorated. That is where I got to today, but as I went to club I didn't get much further. It is probably a good idea to let the glue finish drying anyway. Maybe.
So, club. That happened today too. Today's lesson, as mentioned, was a Lily, taught to us by Member Sherrill.
Sherrill's Flowers 1:12 scale and beyond
We had a choice today - an Asian Lily (Pink with spots) or the Easter Lily (white with green towards the petals). I went with the Pink Lily (which of course, should come as a great shock to the majority of my readers).
Supplies!
We started out with cloth cover wire (stems), bunka (stamens), Punched paper shapes (leaves and petals), florist tape (to wrap the stem), bag o' dirt, and a bead.
We began with the petals. A clever trick was to have a little card with double sided tape in which to secure the petals. They were attached just at the pointed ends, to make them easier to manipulate, but not so much on the tape as to tear the paper. Next, the petals were painted - we used water colour pencil crayons to tint the petals, then went over the petals with a damp brush to get the desired effect. The spots were added using a mechanical pencil, which was very effective.
Petals on a Card
To prepare the middle bit of the flower, we glued an end of the bunka to the stem, and then cut the bunka away. The bunka was teased out, and we put tiny drops of paint on the bunka ends to create a stamen appearance.
Stamen Structure
Then it was time to add the petals. We used 5 petals. Strictly speaking, Lilies have 6 petals, but for whatever reason, 3's, 5's, and 7's - odd numbers, really - seem to just "read right". Six petals can be done, but you have to be rather scrupulous with the placement, and it still can look crowded. In the end, of course, it is your choice.
Petals Glued!
Right now it looks a little like an slightly over eager tulip, but eventually - once the glue is dry - the petals will be gently shaped into the lovely curves of the flower. Sorry about the bandage, this is why I know it is better to cut big pieces of matboard with a heavier blade. Happily I missed any major arteries, so it is all good.
Our next task was to to cut a very thinpiece of the florist tape, and wind the tape around the stem, winding in such a way as to "trap" the florist tape so it wouldn't come undone on us. As we went down the stem, we added leaves. We found it a little easier in the end to add a little glue to the leaf before we taped it down, otherwise we had a lot of "pinging" noises and "Son of a Furry Wildebeest!" curses floating over the table, with people going about on their knees on a green carpet trying to find tiny green leaves. It was all very sordid.
We did a few "cheater" leaves as well, cutting a larger punched piece to look like more leaves than there should be. Sometimes in the world of illusions called Miniature Work, we like to have people imagine in the rest for us, and quite often less can be more.
Once we were happy with our stems, and after we curved our petals and leaves gently with tweezers, we cut the stemto size based on the pot given, and glued our flowers into a pot (bead or wooden finding). Here is mine.
Asian Lily
I didn't add dirt, although some was supplied. I felt this gave my plant a more "Asian influence" look (whatever that means) , I suppose - less, once again, is more.
Thus, with my little pot of flowers set up to dry, my day has come to an end. I hope your First Weekend of Spring has brought many more promises of life bursting forth, and less of that silly frozen water that has just overstayed its welcome, in my opinion. Many happy days until the next time we meet, my friends.
PS: Here is a little video on how to make a mini rabbit, since it is the season - feel free to make it smaller, but the technique will be the same. Enjoy!