MECO Show and Sale

MECO Show and Sale
2016 Show & Sale will be the Saturday 14th May 2016 held at the Peachland Community Centre in Peachland BC. contact person Barb Janes-Yeo at 250-757-2842 barbandpaulyeo@shaw.ca

Sunday 25 November 2012

Glitterati!


"Bavarian City Of The Rockies"
A few weeks ago, I saw this picture of my home town posted to a social network,  to be named sometime later in the company of good friends and to their faces (cough), and I thought to myself "Did I REALLY grow up in a Christmas village?!!?". Sometimes it is amazing how the familiar just disappears -I lived there for so long, this just ... blended into the background.  It was a unique childhood, if I think back - some forward thinking city leaders realized that the town's main industry was not going to last forever, and turned their hopeful eye on tourists seeking out a quaint "Bavarianized" townsite, replete with such features as a babbling brook with several little arched footbridges, gazebos, fountains, cobblestones,  "old world" buildings with fretwork and vibrantly  painted walls, a wandering accordionist or two, and the world's biggest cuckoo clock - and all this was normal to my eye.  In retrospect,  I blame my adventurous colour choices and love of all things sparkly entirely on this childhood experience

The "Platzl"

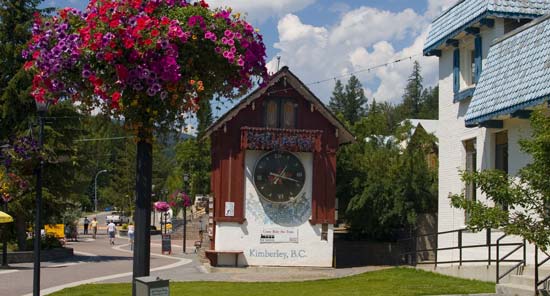
World's Largest Cuckoo Clock

 Anyway, enough blatant self-promotion. 

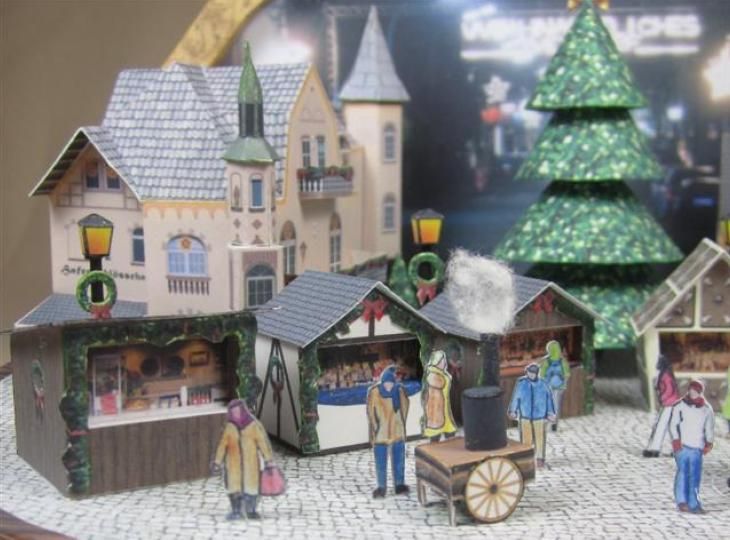
Today's topic, and you knew I would get there eventually, is glitter houses. What is a glitter house, you say? You always ask the best questions!  Here is a sweet example...

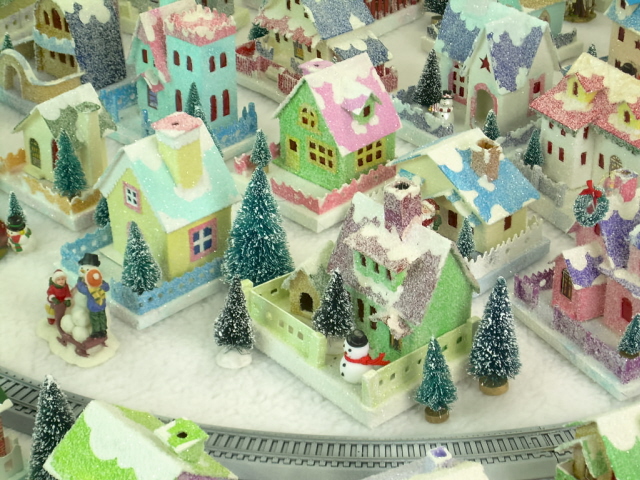
Glitter House Village at Big Indoor Trains
"Ah!",  you say now, "I know these!". They appear mostly at Christmas, although train enthusiasts have used these little houses as backdrops for their train set ups over the years. I notice they are enjoying a bit of a popularity this year, given how many I have seen - or maybe now I am seeing them because I wanted to make one - half dozen of one, 6 of the other, I suppose.  For a better history of the glitter houses, go to Big Indoor Trains. They also have some absolutely wicked patterns and tips on making your own house. They tend to be more 1/4 scale "ish", but a clever chicken might print them out and then reduce them to the size they need. As well, About.com   also has printies for an entire village - again, fairly large but reducible. Experiment with paper choices, though, some details don't come out as well on cardstock as they do on photo paper.  Or, you could do as I did, and find gingerbread house templates. Member Marnie made a gingerbread village at one point in time, from the templates she got from Member Rosemary's long ago workshop, and I decided I was going to do something similar, but with a glitter house flare. 

Template from Rosemary's Gingerbread House workshop
 I started out with cutting out and assembling the little houses.  

Two houses I assembled
  Next was a trip to a craft store, where I picked up some exceptional fine glitter, Martha Stewart brand. I have nothing but good things to say about this glitter, it is amazing for small projects like this. However, it can be a tad steep for some budgets, so make sure you buy it when you have a coupon - its a good thing. 

Glitter and Paint!
I may have gone over the top with glitter, but then again, can you have enough glitter? Possibly, but I haven't found my limit yet. Black would have been handy, in retrospect, in both paint and glitter. I went for the pastel paints, which I used as a base to add to the colour of the glitter. In the end, it doesn't matter if you choose subtle or bold for colour, it only matters that you kind of stay in the same colour "family", and then you will always have a pulled-together look.

The base coat goeth forward
 The problem, although minor, with the gingerbread house was - the gingerbread houses used candy as windows and doors. I tried to do some printie doors and windows, but in retrospect all I would have had to do was to either cut these openings before I happily glued everything together, or made small rectangular pieces  that I could add later on (either out of coloured paper, or from a painted piece of cardstock).  Simple shapes are the best for these houses, as they are not "true to life" Once you start glittering, you don't have to be so careful about crisp edges - after all, it is a frosty winter house, you will see blurring of lines. I started out with my printie door,  changed my mind and ripped it off again in favour of the cardstock rectangle door. Unless you are really steady of hand, painting on a door is just going to lead to tears, or at least paint boo-boos - explaining the blob of red paint on the base that looks not unlike a mini-crime scene.  I wasn't so worried about the paint on the base, though - I was going to cover it up anyway <cue sinister music>. 


Glitter is being applied!
The glitter technique is very easy. Use a toothpick to apply glue to the surface you want glittered, choose your colour, and gently sprinkle the fine glitter on, and then knock the excess off. Try not to get too frisky getting the glitter airborne though, you don't want to be the first patient on your block described with the condition known as "glitter lung"I did one colour at a time, in small areas so the glue wasn't drying faster than I could glitter. I glittered over a little dish, so when I was done, I could put the excess glitter back in the bottle. When I was finished one colour I would clean the dish, and then I could go to the next colour. You don't have to do this, but I don't want to waste glitter, and the glitter hues remain separate this way. For the base I applied gesso and then - as you might suspect - I glittered it too.  I used gesso only because I happened to have gesso already in the house, but one could also use the textured snow paint that is available, or <insert favourite technique here>. 

Glitter house finished
 After everything was dry, and I was happy with the glitter job, I started to decorate. Note I put in a chimney. This started out life as a little rectangle that was folded in half and then in one-quarters (so it folded into a square shape which I glued together), notches were cut out of two sides to accommodate the roof,  and the whole thing painted and glittered. It was an after thought, but it turned out well, I think. Of course, one could think of these things first, but where is the fun in that? 

Closer view of glitter house

 My finishing touches included snow on the roof, trees (made out of teeny pieces of fake florals I had, dabbed with glue an dipped in glitter - the Christmas tree was potted in a gold bead from my stocks). There is a tiny Santa over by the corner too, left over from last week's project. I glittered him too. 

So, that is one down, a village to go! As I finish, I will post. Eventually I want to do as Member Marnie has done, and make a village in a clear plastic chocolate box. Yes, the chocolates will have to be eaten first, but that is a sacrifice I am prepared to make for my art...

Sweet glittery dreams, everyone...

Glittery and Pink!


Sunday 18 November 2012

Have Yourself A Merry Little Christmas....

Cute little paper diorama - more examples HERE

Almost 3 weeks ago, at approximately ....oh... lets say 12:01 on November 1st, 2012, the Christmas season officially started (well, except for a certain card company line of ornaments, on sale in August of each year when it is still full on summer , which is a tad depressing, but I digress). The malls are all decked out now in Christmas finery, although I note Santa is not quite entrenched in the grotto yet - much to the disappointment of the  small boy yesterday who saw a giant gorilla display in the middle of the mall and proclaimed excitedly to his mother  that  "Santa Is HERE!". Probably it was a mild let down when he discovered the fat jolly oversized toylike figure was in fact a statue of a vegetarian precursor to his own species, inexplicably paired with a  display for a smoked meat and cheese stand. Or not, some kids have strange Christmas wish lists. 

I do love Christmas though, even though it can be a time fraught with family angst, hard feelings, fights, and strange compulsions to suck up to the boss with generic group gifts bought with money extorted from the lower ranks by some alpha worker higher up on the food chain. I am willing to overlook all that, however, and go straight to the Christmas trees with their festive merry lights, the cheery songs (although I could give the occasional social posturing Christmas carols a miss, you know the ones of which I speak...), the sparkles, the food, the brightly wrapped packages,  and of course the magic that can happen if you are very fortunate indeed. 

Today in club, we kicked off the season in a tiny way - little Christmas dioramas. The project was led by member Elizabeth. It was a fairly straight forward project, although when she suggested a magnifying glass...she meant it. 

Christmas Diorama Box
Now, to explain the resolution and give you an idea of what we were working with....


Tiny Box!
I am guessing if you want to call this a scale unto itself, it would be roughly somewhere in the range of 1:192 ( one foot equals 192 inches).

The project was essentially a smaller version of the shoe box diorama, in which you start with a background picture, then add features coming forward in the box to add depth to the scene. Here is a picture of what we started with...

Paper printie with box, insert, and characters
We cut out our box lid, bottom and  the Christmas tree insert first. We did not cut out the Santa figures yet. You may ask - nay DEMAND to know  - why we left Santa uncut for the time being. Answer...he was only about 1/4 of an inch tall,  so  was very easily lost should a random breeze come along, and given that it is cold and flu season now, random breezes occur more often than you think. It was best to save him for "last". 

The box parts were scored, as was the insert lines. We tackled the insert first.  We got our folds nice and crisp, then unfolded again for the next step. To make the tree sparkle, we applied small amounts of glue to the Christmas tree, and dipped it into a fine glitter (Martha Stewart brand - it was indeed a good thing). We set that aside to dry, and built the bottom of our box. To release the tabs, we made small horizontal incisions (but not vertical ones) on the tab lines. We then glued the tabs to secure the box. Next, we tackled the top of the box, but this time after scoring, we cut out the front panel for the window, and we made vertical incisions into the tabs. This was to distribute the bulk as much as possible so it wouldn't get too thick when folded - remember, the tinier the endeavor, the more important it is to thin down the bulk for scale.
Workin' hard in Santa's workshop

We tackled the "window" next - which was a piece of clear thin plastic. We dry fitted until we had the "glass" just a little bigger than the "window", and carefully glued it in. We proceeded to glue the box together at the tabs, and set aside to dry. 

As the insert glitter treatment was dry, we moved on to cutting out Santa, and gluing him a little forward in the box (again, to give us that 3D feel). Once he was dry, we added some slightly heavier glitter to where Santa was standing, and along the base - not, however, covering the tabs. We did bend the tabs up to make sure we had enough clearance at the tabs, so the insert could be bent into a box shape. 

Once that glitter snow was dry, we cut out the little tabs (again, reducing the bulk) and inserted it into the bottom of our boxes. The lid was added and voila! A tiny Christmas diorama, ready to add a little ambiance to a 1/12 scale scene, such as the one that is being developed below...

Rosemary's Santa and Mrs. Claus diorama in progress

All in all a great little project!  This could easily be translated to a different season, of course - Easter, Hanukkah, etc. Imagine, the whole world, in a portable little box - very meta.  Hope you enjoyed this small foray into the early days of Christmas 2012... until next time, my little elves! 

Maggie the Dog keeping an eye on us all


Sunday 11 November 2012

You Are Such a Tea(s)

Tea and Cakes from Essentially England
Admittedly, I have become a tea snob over the years (also a chocolate snob and a coffee snob for that matter, but those are posts for different days). I found once I got a taste for fresh loose leaf teas, the bagged stuff just wasn't cutting it (especially when it has been sitting around too long - tea does go "bad", 6 months tops and that is when it is in a sealed tin. A TV character once quipped drinking tea made from bags at the best of times was like "drinking paper-flavoured water" anyway, and I dare say he was right)As a snob, choosing the right tea is quite important as well - I spent quite a bit of time in a tea shop yesterday having the harried staff waft tea odors at me, and it is surprising just how violent of a reaction one can have to the wrong tea - what your nose, of course, doesn't like, you certainly won't. I eventually settled on something that was close to what I sought in their brochure (I don't think companies should be allowed to tease me with exotic descriptive names like  "snow geisha tea" and then not stock it, don't they know WHO I am? Sheesh...), that being an evening tea with floral (rosebuds) undertone and a slight sweetness overall. It had a rather exotic name as well, so I was placated for the time being.

Tea, beyond the more visceral delights (and occasional horrors),  is an elegant social event as well - there is no rushing to the end with a proper cuppa. It is meant to be brewed with careful attention to water temperature, freshness of the leaves, presentation, etc., and if you don't have a beautiful cup and at least a nice selection of delicate lacy-froo-froo cookies, you just aren't doing it right. I did mention I am a snob, right? 

Cutest EVER cookies in a tea cup

 
Beautiful cups...this brings me to our project of the day. Tea cups make a wonderful backdrop for a small scene - generally 1/144 scale or 1/4 inch scale is the most common treatment, although you can do just about any scale, depending on how you organize your thoughts and supplies. Old  and inexpensive tea cups are in abundance at second hand stores and the like, so you needn't rob grandma's china cabinet  and muck up her wedding china that had  the special hand painted periwinkles on and make your cousin - who thought SHE was going to get them in the will - livid with anger and never speak to you again. 


A quick synopsis of the process can be found at the about.com's  website, but also some interesting things are to be found on this teacup roombox page. The designer  on the about.com site used floral oasis, we built our stages up from a Joanne Swanson design using a paper template. In the end, it doesn't matter how you get there, what matters is that you have a flat surface to work with - in essence, you are building a stage so you can set the scene

Rosemary's Christmas scene
 Above is Rosemary's take on the teacup - what fun, a winter wonderland! Note that it is encased in the frame that I have neglected to finish low these many months now. 

Closer shot of Rosemary's Christmas Cup
 
A slightly different angle on the Christmas Tea. That little gingerbread house sitting there looking all very luscious in the background was  something she once taught us in a workshop

Barb's Teacup
This kind of reminded me of where I grew up, which was actually  a small alpine-esque village. I remember houses like that being common around town, and big yards with towering pines. If you close your eyes, you can smell the fresh mountain air....ahhh! 

   
Barb's second Teacup
 
 You see what I mean about scales not being a limiting factor - the darling little fairy was from a dollar store find. I love the little dwarves, aren't they precious? Look closely, you will see amongst the details, little butterflies hovering over this idyllic field.
 
Tea by the Sea by Kimi
Here is my teacup. We left the mountains, and travelled down to the ocean for this one. The trees are in fact modified grape stems. The little house came from a show, cost a whole dollar, and actually was a small souvenir from San Francisco. I built this little house on a cliff. I also built an ocean, which is a little hard to see but I used "Triple Thick" (tm) varnish to make water with a little depth.

Too Keyute, right? This is just a smattering of ideas - some I have come across on the internet include this little beach scene (the water is actually little glass beads)....
Beach Holiday Teacup from Google Image
This little cutey involving Alice on a picnic....
Alice Teacup from Google Image
Something to commemorate a special occasion...

Wedding on Google Images
or something to just show you how the day has been going...

Wash day on Google Images

Or something whimsical...

Teacup roombox on Google Image


...and the list goes on. 

Hopefully you have seen the future in your tea leaves at the bottom of the cup, and are duly inspired. Good inspirations, and talk to again soon!