MECO Show and Sale

MECO Show and Sale
2016 Show & Sale will be the Saturday 14th May 2016 held at the Peachland Community Centre in Peachland BC. contact person Barb Janes-Yeo at 250-757-2842 barbandpaulyeo@shaw.ca

Sunday 6 January 2013

Getting that Sinking Feeling...


Eastman Photo, National Geographic Contest


The above photo, apropos of nothing else,   just amuses me. I have had days like this.

Well all, hopefully you are settling into 2013 quite solidly, and are ready to tackle the year with much aplomb, or other fruit of your choice. Let's get on with it, shall we?

Today I felt a little quarter-inchy (probably not an official word, but people who write dictionaries tend not to get out into the world much, and they rarely call for my neologisms anymore), and I dug into something I bought a few months ago. One of my friends decided that she was going to downsize a bit when it came to miniatures, and focus more on one scale only. Fair enough. Occasionally miniaturists do downsize, although it was  suspicious that the world was supposed to end within months of her making this decision - coincidence? I will let you decide. She was gracious enough to share the wealth that was her quarter-inch stash, of which I grabbed a sizable chunk. 

One of the treasures (and oh, did I ever get a boatload of treasures, did I mention? )  she sold to me was an offering from Petite Properties . This company has some wonderful little houses, in various smaller scales, along with instructional books. The best part of their instructions is that they rely heavily on commonly available supplies. This is one thing I have appreciated about the British over the years (outside of Dr. Who) - you almost never have to go farther then your office supply store or craft store, or sometimes even your junk drawer, to complete a project, and never have to order the special kit that is only made by cloistered nuns on a Tuesday at midnight during a full moon.

 I look forward to starting my Washtub Cottage and populating it with the furniture from the instructional books. Today I felt like making the small sink cabinet, as below: 

The Sink Cabinet - Petite Properties - Part 2: Fiona Broadwood
 Impressive little beast, isn't it? Believe it or not, it is made of paper, seed beads, stickers, matboard, sewing pins and staples - McGyver would be proud. 

Template For Sink
Very simple - just a "fold and glue" interface. I used my cardstock and just photocopied the pattern. I could have easily traced or drafted my own as well, as the diagrams and sizes are well mapped out. I did admittedly have a little trouble with some of the dimensions, as I am relatively sure that I measured correctly in some steps, but the proportions were off. I am not sure if it was a typo in the instructions, or if it was because I photocopied the original and did not draft it out - although I was told to trace the pattern, leading me to believe I did not start out with too small of a base. If you buy these instructions, just remember to dry fit and use your own good judgement if something doesn't feel right. 

Folded Sink Cabinet
It is a little difficult to see, but this is the cabinet when folded up. At this stage of course it is a little fragile, but that problem is solved with adding the base. 

Better-ish Picture of Folded Cabinet
Adding a Base
The cabinet was attached to the base as above, just before I ripped it off and went a different way. I found the instruction to glue to a big piece of cardstock or matteboard a little difficult to do, in that it was a bit of a pain to try to cut around it equally. I went an alternate route, and just cut out 3 cardstock bases, glued them together, and then affixed the cabinet body to the base. Helpful hint - applying glue to the bottom of cardstock is a messy affair. What I chose to do is put glue into a tin pie plate, then dip the cabinet body into the glue. It wasn't as fiddly that way. 

Cardstock Base, before Gluing Together
I found 3 pieces of cardstock piled together gave me about the right depth for a cabinet base.  Always remember to let the glue dry thoroughly, and then trim sides if needed. 

Back Splash
The back splash started out life as a tiny rectangle of matboard, which was then scribed to make it look like wood. Remember your math class/physics class in that - when measuring - always be consistent, and don't measure from your last line but from the straight side (lest you make a variation of the  "Tsar's Finger" - whether the story is true or not, the logic is sound. If you are out by a little on one line, it means you will be out that much on the next, and the next, and so on and so forth. It is better to always have a reliable benchmark to start from). The other important math tip is to follow again the Rule of Three - never join a line with only 2 measured points, because there is too much variation, a 3rd point gives a mental check mark that your ruler hasn't shifted.  Also, be consistent with your ruler, because moving the start point matters greatly the smaller you make an item.

To scribe the lines in, I used a knitting needle over my pencil marks. It is blunt enough not to cut the paper, but small enough to make realistic looking plank marks. 

Back Splash and Stickers!
These books make use of the scrapbooking stickers - I bought these in a dollar store, but they are pretty common as scrapbooking is still trending at the moment. These ones I bought because ...well.. they were sparkly for one, but also because sometimes my slightly psychic nature prompts me to get supplies that I have no idea what I am going to do with, before they disappear from store shelves and I can't find them in the retail world but... mostly because they were sparkly. I didn't buy them for this project, but they worked well once they were dulled down a little with paint, and they add a nice little interest for the cabinet.

Little Cabinet Painted
The cabinet painted a lovely forest green, and the brashness of the sparklies has been tamed. These stickers are very delicate, so much care should be used when working with them.

Little Drawer and Cabinet Doors added
I think I could have done a little better cutting job (note to self, change blade in matboard cutting tool), but you get the idea. These are matboard, cut into squares and rectangles - what could be simpler?   They were actually supposed to be glued on first, then the whole thing painted, but I gotta be me, as I may have mentioned in the past. 

Painted and "Antiqued"


Once everything was painted and dried, I "antiqued" it with diluted brown paint.  From this picture you  get a good feel for scale, with  the background of a crocheted table cloth. 

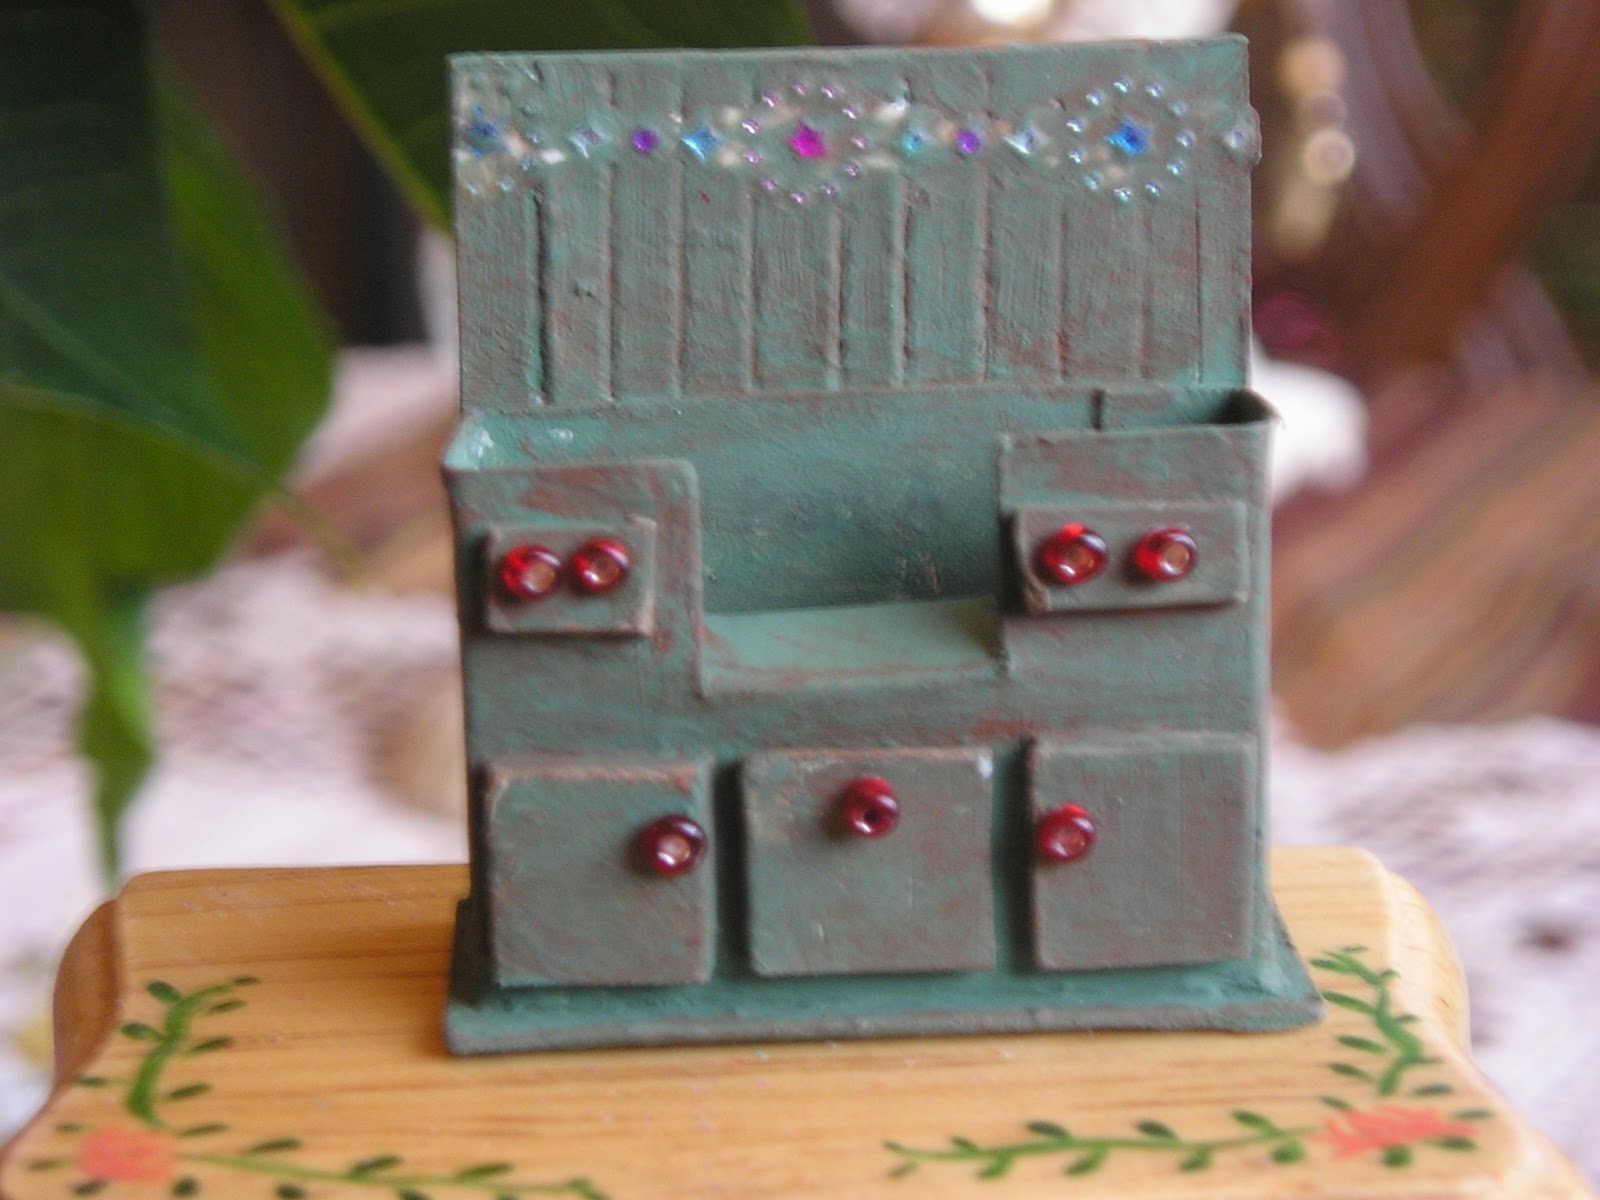
Cabinet with Drawer Pulls Attached
I happened to buy some very small red seed beads that had a silver tone in the middle  from the dollar store. I was going to paint them up, but I kind of like the contrast here. With using tiny seed beads, try to use beads that are similar in height and shape - not all seed beads are created equal. One could also use holeless beads for pulls, or even very thin tiny pieces of metal or painted paper as well. 

Cabinet with Sink
It doesn't look like much now, but that is a sink sitting in the middle. I think if a second one is created, I will make it square, the oval that they had me make was a little difficult to glue. I also found the method here a little fiddly, because the cardstock wasn't really pliable enough to glue nicely around the formed base. Perhaps I should have just used regular printer paper for this step, and then built up the thickness with paint.  Or I could have let the cardstock find its natural curve, and then glued that down to a base (they did, however, want the sink to hide the base,  but a clever chicken can always do a little camouflage if need be). What a person could do as well, if they were so inclined, would be to make a very small polyclay sink base. 

I ended up painting my sink silver. I just thought it lended a rather interesting charm to it. 

The Sink Top
This is how the counter top started. It is not how I finished. This is one of those steps where I found the numbers to be a bit off, but no fear, I simply adjusted to fit. In the end I went with a square sink top, but instead of having the back open, I left the "cut away" piece intact, merely scoring it and folding it back. I found it added a bit more 'heaviness' to the cabinet, and more depth. 

Sink top with "cut away" Still Attached
The above is a bit better representation of what I was talking about. I used matboard but could have proceeded like I did for the base as well, it would have just taken longer. I painted it and then did a little antiquing. 

The next step was fun - the faucets. The pattern called for dressmaker pins and staples. I suspect my stapler is currently behind a wall of treasures, and I didn't want to dig, and I used jewellery findings instead

The pins were cut down first. I can't remember where I picked this hint up, but at some point someone told me when I am cutting small, unpredictable pieces of metal that can fly anywhere and of which can come back to haunt you later, one should cut the metal in a plastic bag. This prevents inconvenient discoveries later on. These cut-down pins were drilled through the cabinet top to act as taps. The findings were glued as the faucets. It is fussy work, but very impressive once you have gotten things positioned and the swearing has stopped. 

My Finished Sink
And There you have it, one very sweet little sink cabinet. I trimmed the top with a little piece of painted matboard, and painted where the faucets come out silver. I am impressed with my first foray into the Petite Property line, at any rate. 

That is all for today,  and I hope you enjoyed this little review - until next time, my loyal friends!


The Real Full Sized Deal for Comparison


No comments:

Post a Comment