
 |
| E9A #932 similar to the EMD F3 Diesel Passenger Train from the 1950's Featured Today |
Of course, this isn't to say I haven't appreciated something to do, what with all that hubbub about some sporting event or other this weekend.
 |
| " I think its called the "splendid ball" sir..." |
Awesome. Lets get this trip underway! Where we left off, I had cut and glued my buildings, but didn't have my trains done yet.
 |
| Passenger Car Before Excision |
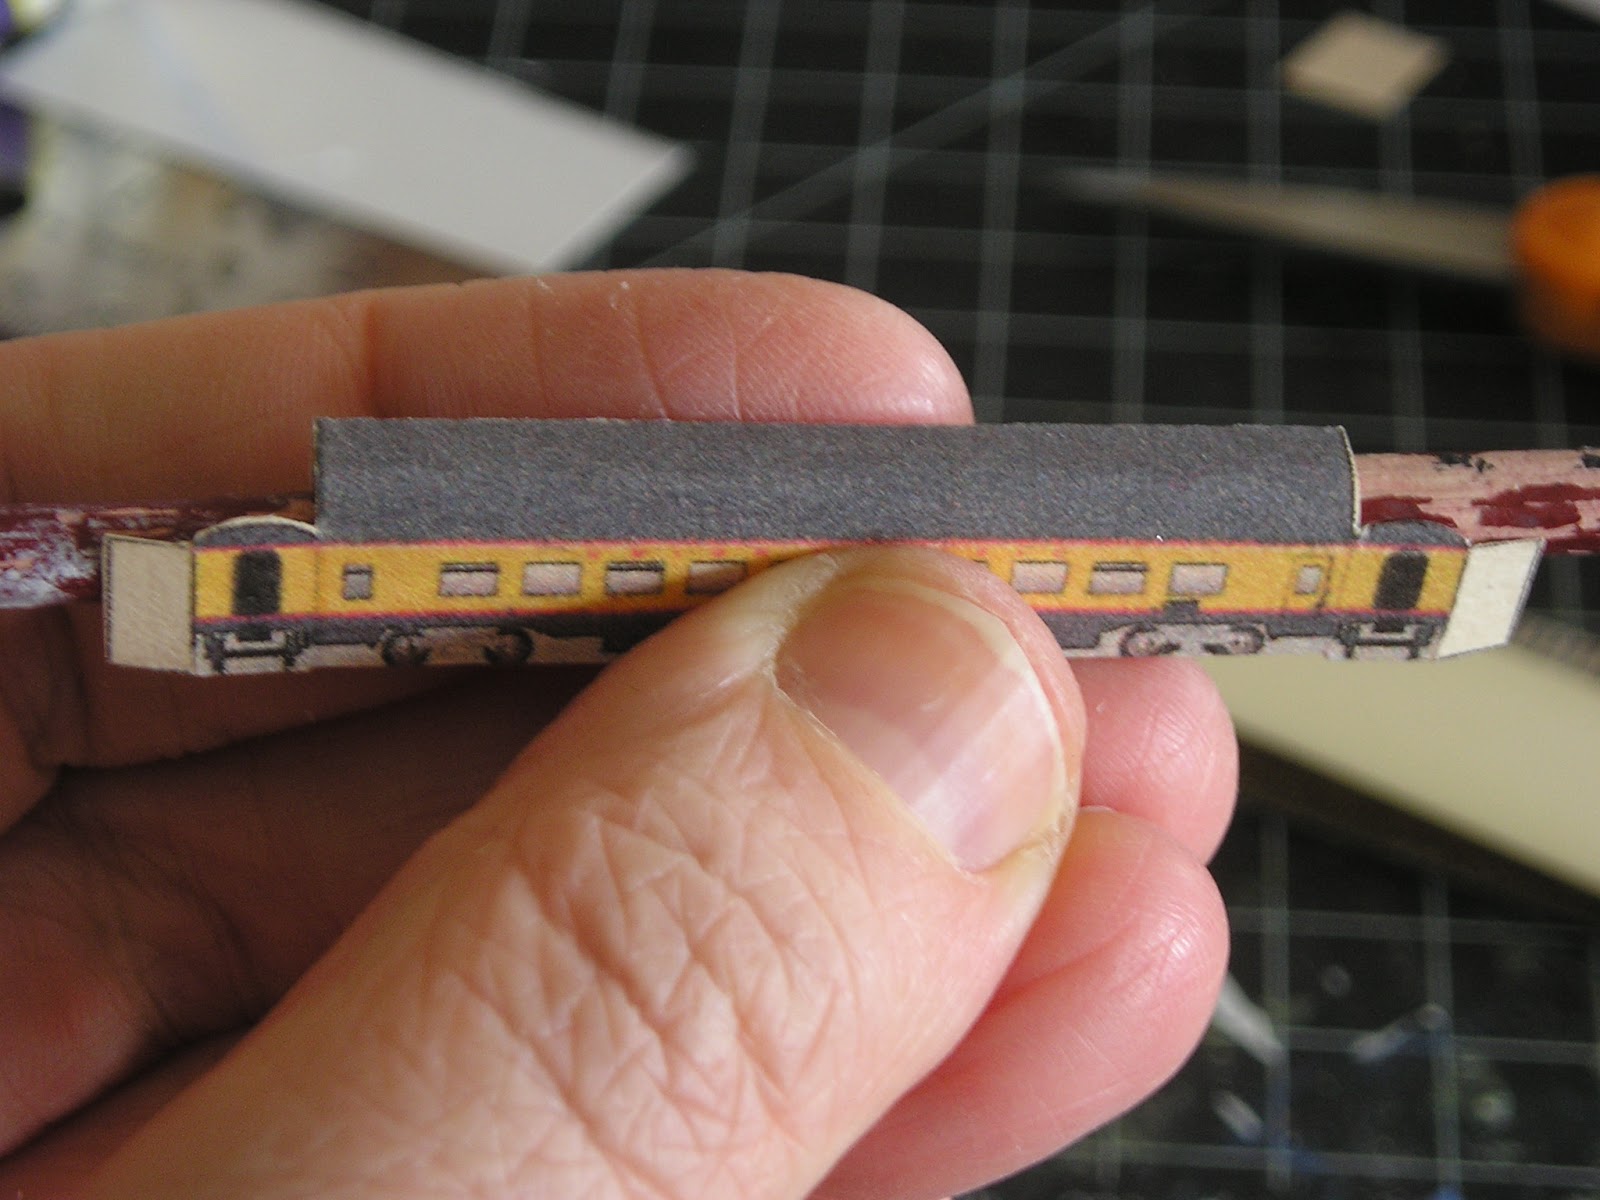 |
| Passenger Car In Progress |
Although tiny, this was a well thought out design for a printie - one caveat was the instructions were written on some of the cars and not others, but if you did the unlabelled cars first and used the others as a guide, things went smoothly. I by and large ignored the instructions (okay, so I usually do anyway), as I found that with the way the cars were designed it was fairly straight forward in how things were put together anyway. The passenger car was essentially a box again, but the roof was rounded. I used a paint brush handle to get the appropriate curve.
 |
| Passenger Cars Assembled |
 |
| Engine |
 |
| Little Engine with Passenger Car |
 |
| Train with Passenger Cars |
 |
| Town and Train Put Together |
 |
| Making Tracks |
Admittedly, I went a little overboard with the track, in the end I only needed a small percentage of what I did excise, but was thankful I had extra track when I needed to modify angles and such. It took me several hours, however, of very tedious cutting. We were given in our project package enough trains and buildings to do a second one, so maybe I will make a different lay out with a different theme at some other time.
 |
| Picture of Where We Want To End Up |
 |
| The Town Layout |
 |
| Whoopsie |
This is what happens when you carry your project bag upside down. Isn't it odd that you can struggle with a plastic sleeve to give up its contents, but the minute you aren't looking everything falls out with no effort at all? Murphy, that wag, has been making rules again.
 |
| Layout with "River" Cut Out |
To give the river depth, I cut the water out of the layout, traced where it would be on my foamcore, and crushed that area to form a river bed.
 |
| River Bed Traced |
 |
| Making Geography With A Blunt Object |
Once this was done, I used some blue paper (provided in our project bag) and glued that into the depression I had just made. I glued the layout on top of that.
 |
| Layout, and My Feet, Apparently |
 |
| Triple Thick Varnish By DecoArt |
 |
| Fitting the Train Set to The Layout |
 |
| Landscaping! |
When I finished getting the track down, and my town in place, I looked at it thought ... well, that is boring. I realized that a) the track was a "closed" track and b) everything looked a little "flat" in colour.
To deal with the first problem - what do I mean by "closed" track? Simply put, before track modification my train (if it was real system) would simply follow two loops around the town, but never be able to go anywhere. Fine for a child's toy, I suppose, but an adult enthusiast just wouldn't have this happen. It does not make sense that layout with such a small downtown shopping area would have two big engines and 3 passenger cars serving it, along with a fairly good sized depot. The train would never leave the area, doomed to circle around the town only a couple of blocks long. I mean, who do they think will be riding this train in a town that would take 10 minutes to walk across? Just getting to the depot, you are liable to walk past your destination anyway, and guess where you would end up getting off the train? Yup, at the *depot*. It just wouldn't happen, and if it did, someone in the city planning department would be getting fired, unless they were lucky enough to be the mayor's nephew, and even then it might be touch and go. So, I put some extra track down so it leads off out of town (I included 2 traffic paths on one side of town, and two on the other). That way, the eye can resolve the fact that this isn't really bad city planning, and gives the whole thing a feeling of movement, which is the heart stone in the model train genre.
For the second problem, I decided to landscape my layout and give it some colour, some interest, some "pop", if you will, so a flat paper project that looks like a flat paper project turns into a diorama that tells a story.
 |
| Rail Bed |
A word on toothpicks. If you can find plastic ones, it can make the gluing easier because a) plastic doesn't swell with moisture like the wooden toothpicks do and b) you can wipe off the glue boogie (that sounds like a dance, doesn't it? Everyone do the Glue Boogie!) that inevitably forms and causes too much glue to be applied.
 |
| Track with Ballast |
Already the track is gaining character. I have also added sand to the river banks in this shot.
 |
| Landscaping complete! |
The "grass" went on a bit faster, as I could "paint" larger areas with glue and sprinkle on the "grass" quite quickly. The "grass" is actually very finely chopped flocking. This is NOT a product which you want to breathe in, as there is something called "Flock Worker's Lung", and can be serious. Take care that you aren't getting this stuff airborne, and use in controlled settings. If you use this a lot, you might actually invest in a mask. Isn't it amazing how dangerous a miniaturist's life can be?
 |
| Town Glued Down |
WAIT. You say, where is the little red caboose? There has gotta be a little red caboose, otherwise what is life for? Wondered that myself, actually. From what I can see, this 1950 era passenger train either didn't have one, or not a red one, at least (the bright colour, by the way, had a function, it was to make sure the train was visible from other approaching trains). A caboose may appear on a side track eventually here, but I may have to figure out how to make one as one wasn't included in the kit. All the printies I can find at the moment usually include happy smiling little children's trains and it just won't do (although admittedly, when I was a kid, I hated anthropomorphizing non-living things anyway, even then I wanted realism, so a train with a face is just plain wrong - sorry Thomas). Cabooses were originally places for the conductor to do his paperwork, and this was its doom - once computers came into play for controls and the conductor wasn't as responsible for the paperwork that comes with running a railroad, the caboose faded from existence, as its importance faded. They were technically phased out sometime in the 1980's, although I am sure I have seen cabooses once or twice since then. Until I can figure this out...and I *will* figure this out... here is a little red caboose moment so we know the train has finished passing.
Until next time, fellow travellers!
No comments:
Post a Comment