MECO Show and Sale

MECO Show and Sale
2016 Show & Sale will be the Saturday 14th May 2016 held at the Peachland Community Centre in Peachland BC. contact person Barb Janes-Yeo at 250-757-2842 barbandpaulyeo@shaw.ca

Sunday 31 March 2013

A Joyous Easter To All!

Thank You Easter Bunny!
Well, by now, all chocolate rabbits have had their ears mysteriously bitten off, - which of course is the correct way to eat a chocolate bunny, as everybody knows -  and all the brightly colored eggs have been found and accounted for. Well, almost. There is always that one egg that goes missing, right? I remember the phone call from my uncle, letting us know that one of the eggs had come home with him...in his shaving kit. We kids were blamed, but finding hidden Easter eggs is serious business, especially when there is a prize on the line for the most found, so there is just no room for shenanigans such as that - I suspect an Easter Bunny with a wry sense of humor did the deed, although we did have an exceptionally bright cat at the time as well, and I am not ruling her out either.

For me it was a fabulous Easter - I mean, just look at that basket above. There is enough in that basket to keep me going for some time, as long as I don't let my chocolate-loving friends and relatives in the door.  What a difference a week has made too - the sun is out, it is warm enough to ride, and those who have been peering suspiciously out the windows for the past few weeks, desperately waiting for the weather to have a change of heart,  are rewarded today with a quite unseasonably warm Easter. This is spring, the one my heart sang about when the bitter winds were whipping around my wool-covered person just days ago. 
Easter Eggs, so Lovely

I worked a little on my Peddlar's Stall this week. I still have to find an awning, but it is taking shape. I think I may just have to print one up eventually.

Peddlar's Cart Painted
I chose a rather nice "Soft Apple" Green. Unless I told you (and I did tell you so that ship has sailed away already ) you would never have guessed that the bulk of this was matboard. Well, maybe you would - you have shown yourselves to be quite clever in the past about such things. 

Antiqued Stall
More often than not, and unless it is a very unusually well-kept and proud Peddlar's market, the stalls get pretty roughed up, what with being exposed to elements plus accompanying dirt/mud, and also because if you give a spot for people to lean, they tend to lean (one of Newton's lesser known motion laws). Paint gets rubbed away, wood ages, and you get a well-loved patina, which of course weekenders love because of its "quaint charm". Makes one wonder if these stalls actually come this way for that reason too, but I digress.

I also built a stand for the merchandise, which is a simple staircase build with risers and treads. I gave the stand the same treatment as the stall, and glued it down.

Having Some Fun
I don't know anyone who can resist the urge to "see how it might look" in the end, and that includes me, so I filled my shelves  with my more festive bits of Easter that I had stashed in my various hiding spots. This will change much, but I just wanted to play. If you wonder where I got the little rabbit (and I know you were) I found that in a dollar store in a bag of generic plastic toy critters - you have seen them, the cow that in real life would be the size of a chihuhua, but the mouse is the size of a buick. However, occasionally you will spot that one gem among the turkeys (I have found turkeys too, for that matter).  The daisies, which are a little early yet to be in an Easter tableau, were from a swap many years ago. The daffodils and Iris were left overs from kits I bought for my fairy garden a few years ago. I think the fresh eggs were a grab bag find. The Easter basket and decorated eggs were from past workshops that Member Rosemary taught. The hat was from a work shop that Member Marianne taught. Not seen so well were a little merry-go-round charm  that I found at a craft store (honestly, go into the tween stores or the tween-themed areas of stores, I have found amazing charm bracelets and the like, not too expensive but certainly useful), and a blue chicken that I found on a chocolate cupcake, so kindly supplied by Member Sherrill at our last meeting - Honestly, I don't know if I was more excited about the chocolate cupcake, or the chicken on top, but so goes the life of the chocolate-loving warrior miniaturist with a predisposition towards barnyard birds, I suppose. 

Easter Basket taught by Rosemary
Above is the closeup of my Easter basket project. There are jelly beans, a Peep, the requisite Chocolate Bunny, a decorated egg, and of course a little stuffy (made from pompoms). 

Egg in a Box
 I remember one of my peers very thoughtfully buying each and every one of his friends, including me, one of these eggs - I don't know if they still do this now, but at one point in time you could buy the hollow egg   and they would personalize it with your name in icing. I am personally against hollow chocolate in general, as  the chocolate to air ratio is alarmingly low (mind you, in a chocolate-related emergency, of course, we can't be choosy), but what a thoughtful lad he was to think of us

Are you enjoying my nail polish, by the way? That was an Easter treat. You are probably also politely ignoring the bad paint job, and for that I am grateful.
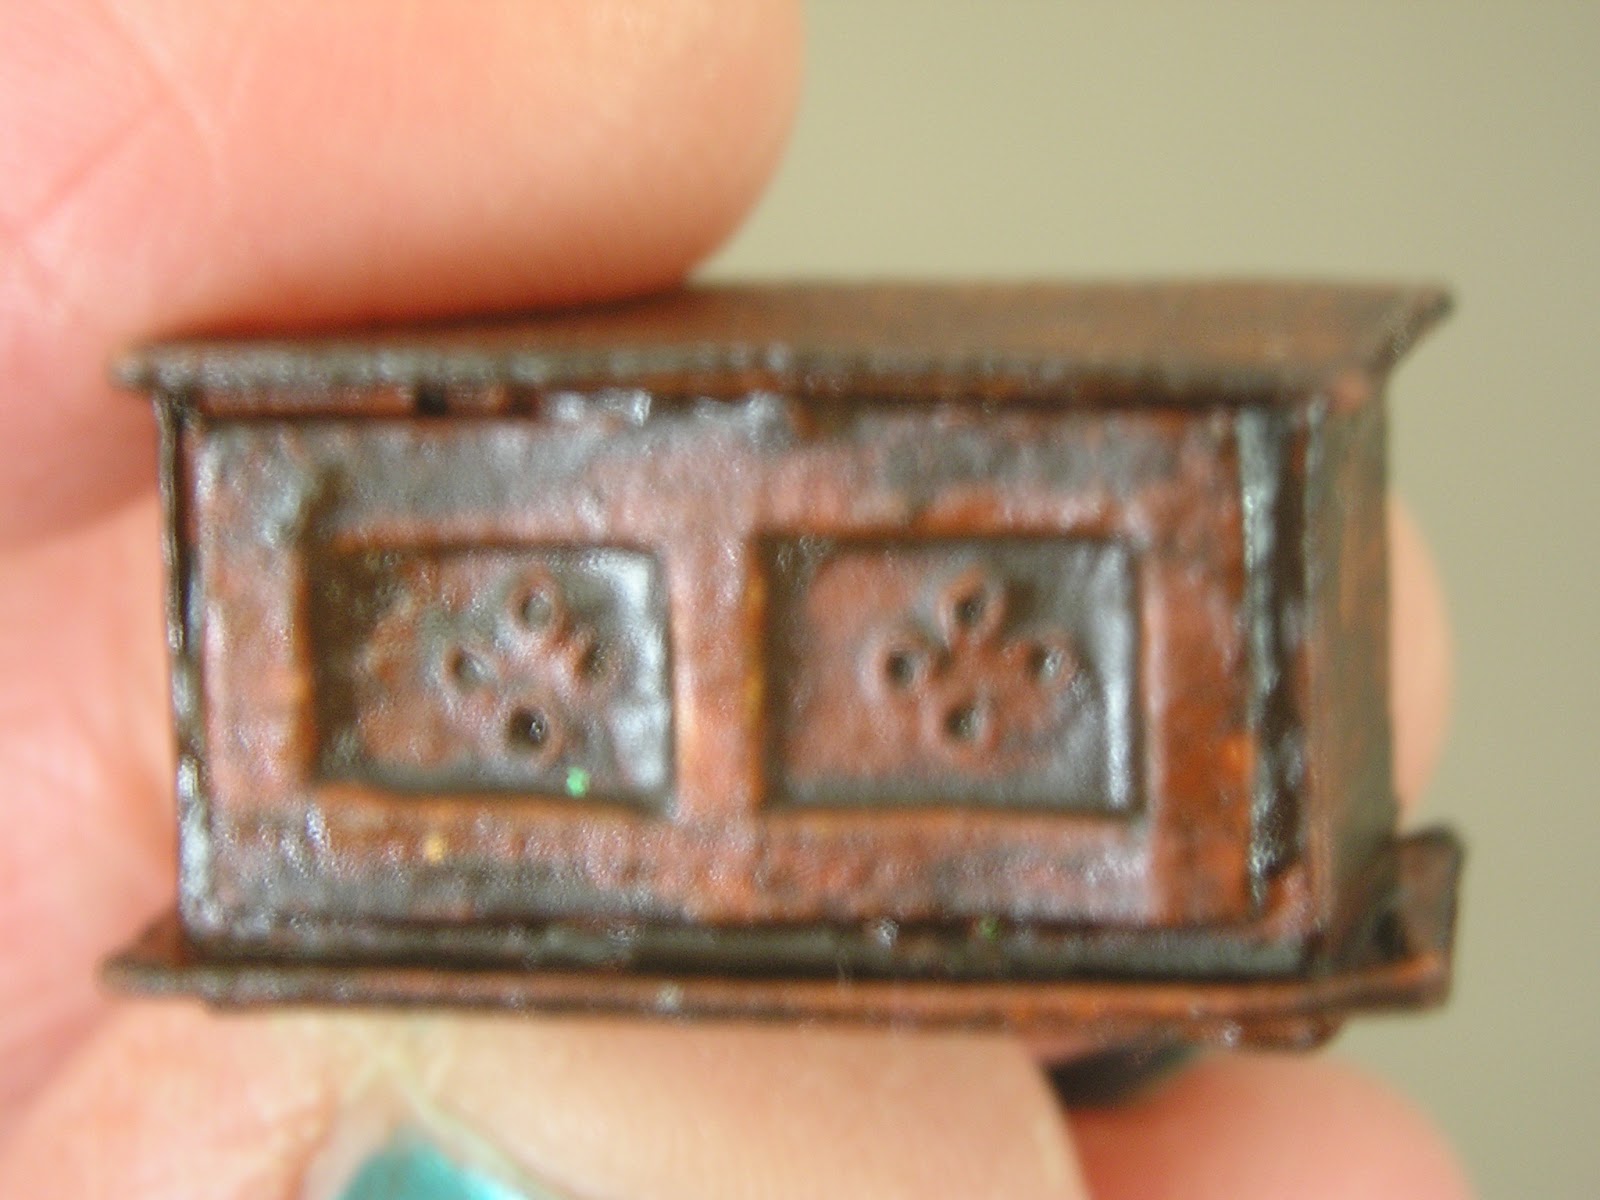
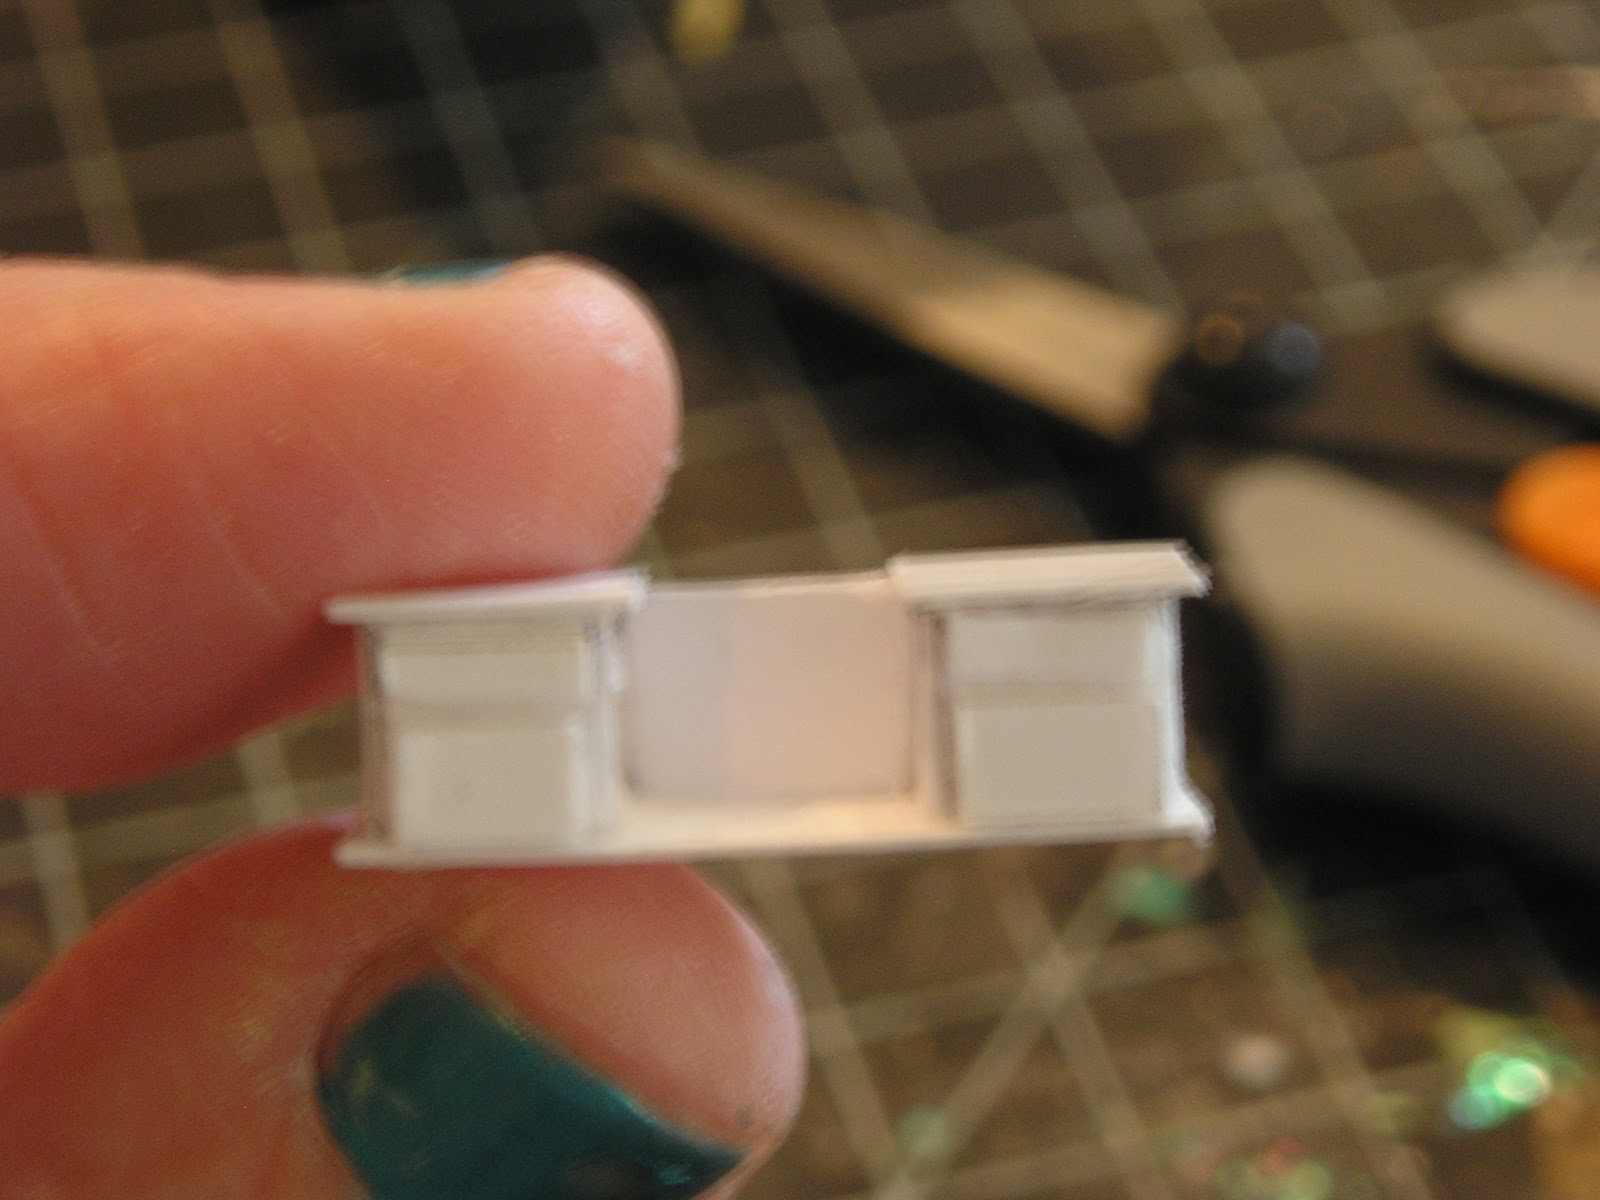
The Medieval Trunk

Detail of Trunk

As promised, a photo of the trunk that I made last week. I am really quite happy with the way these paint up, they look a lot more complicated than they actually were to build. 

Today's Project
I continue my mission to try my hand at every project (or almost every one, still not keen on the beds)  in my Fiona Broadwood books, in ultimate goal of the Washtub Cottage. Today I felt the need to make a dressing mirror. 

Pattern Drawn
My first reaction today, when I read the patternwas "no way" . The size seems dinky.

Top of Dresser Mirror


See what I mean? Ti-ny. Little. Miniscule. Dare I say, itty bitty. But I carried on, as one does.


Gluing the Base
The dresser mirror was very similar to the study desk done in an earlier post, except it is essentially "flipped" over.

Base of Mirror Dresser
Here I have gone ahead and applied the tops of the counters, as well as the drawer fronts. I seem to be getting better with those as well, yay me. There is overhang on all edges except for the back, as that has to be kept flush in order to apply the back of the dresser mirror.

Back of Dresser Mirror
I drew out the mirror, with cross hatching to show me where to cut. Since this is so tiny, I cut out the fiddly bits first, then cut the rest away from the paper. You might do these things differently, but for me this reduces the frustration levels, and the potential accidents that happen when your fingers are obstructing your view between project and blade.


Dresser Mirror Base and Back Assembled


It is starting to look like the picture now! That is always a good sign.


The Mirror Front
The mirror was two pieces, the front frame, and then the mirror proper. Again, I drew the pattern out, and cut all the fiddly bits first before excising it from the main paper. The frame sides are all of 1/16 of an inch, so in this instance one can really see what kind of anguish it could cause if the centre cut out was left to the end. 

Mirror Frame Cut

Look, the queen is totally agog at my mad skillz with the blade! I was going to make the mirror more rounded, but I went a little more gothic with my mirror frame because I just liked how it looked.


Painting the Bits
As there is going to be a mirror added in eventually, it is better to pre-paint the pieces. The pattern calls for medium card for some of the backing and the frame, so I would suggest - depending on what kind of finish has been applied to your medium cardboard (cereal boxes, etc., will be shiny) - to give it a quick buff with an emery board, just to rough up the surface. Otherwise, the paint won't stick well. 

Mirror

To make the mirror, I drew out the pattern, cut it out as before. For the mirror, I just used a piece of aluminum foil. Once the glue was dry (yeah, right, like I ever wait for that) I applied the frame, and I added a bit of Triple Thick varnish into the mirror to give a bit more thickness and smoothness, and less like I just stuck a piece of tinfoil down.

Also Known as "Drawer Pulls" today
Instead of my glass beads for drawer pulls, I found - at long last - micro beads (formerly known as holeless beads, but by putting micro in front of something, you can charge more - true story).  I found two colors - the so called "champagne" colour (I say gold, but whatever) and a silver color, but apparently there is a rainbow pallette available of the beads for those at Hogwarts willing to look.  I understand they are to "add texture" to cards, although in the world of miniatures of course, they become eyes, cookie and cake accents, drawer pulls for micro-minis,  ornament decorations, perfume bottle caps, etc. They are so small they don't come in a count but in a weight, so be careful with them, this is glitter with attitude. I understand Martha makes some too, so if you can't find this brand, they are around under other banners. Black would actually be a very handy color, but the trick is, of course, finding more than the standard gold (s'cuse me, "champagne") and silver in stock. Probably a better bet for color choice  is at a scrapbooking store, but that would have involved me thinking of that yesterday when I was hunting these little treasures down. 

Mirror Dresser with Microbeads
 Once again, I went after my furniture with my gold pen, added those lovely "champagne" microbeads for accents. Spiffy! 

Another View of the Dresser Mirror


Back of Dresser Mirror
 You can see what I mean about that glossy cereal box (well, okay, admittedly it was a coffee box) not playing nice with the paint. I will have to go over it again with a second coat. I did use the glass beads for furniture feet, which I painted gold (no, no, this time, it was gold...!).  I left the mirror back a lighter color, as I always remember these mirrors being a different color to the rest of the piece - be it cheaper wood, or because no one finishes the back as nice as the front. 

A Closer Look
I do like how the paper actually curved out on the sides, like I had actually meant it to do that. Honestly, if I had tried for that effect, I doubt it would have come together as nicely. 

The Furniture So Far...
Twelve pieces of furniture have been made (every last one of you is counting, aren't you...). Some of it, we will see if it can be used in the same setting or not, because there is quite a variation in size. Overall though, I am still liking Fiona's patterns, and with a little tailoring certainly any piece could be modified if someone (me) felt the need to do so. 

Well,  I think we can count this day as seized. Hope your Easter was a most lovely day, and we will talk again soon!

In closing, a little Easter basket Tutorial, brought to you by the fine people of "On A Finer Scale" ... Enjoy! 


Happy Easter, with a little taste of Summer to Come!


1 comment: