MECO Show and Sale

MECO Show and Sale
2016 Show & Sale will be the Saturday 14th May 2016 held at the Peachland Community Centre in Peachland BC. contact person Barb Janes-Yeo at 250-757-2842 barbandpaulyeo@shaw.ca

Sunday, 21 July 2013

(Not Quite) a Midsummer's Night Dream

Right now there is a very angry Shakespeare fan who googled certain key words or images is reading this saying "what the heck, man?" <insert wave, and jolly "Hello Very Angry Shakespeare Fan!>.  Hmm, they left - it wasn't something I said, was it? Anyway,  it isn't technically Midsummer, of course. That occurs in June, at the Summer Solstice. We could have a long discussion about how that makes no sense, the solstice marks the *beginning* of the summer,  in Canada the lakes are just barely free of ice just yet at that point, but who are we to argue with druids with sharp knives? Anywho, faeries. I have a soft spot in my heart for faeries. Well, the Victorianized ones suitable for the kiddies, anyway - I understand there are some malicious ones out there (although that can be said of the humans as well).  There are a lot of methods of keeping the faerie folk away, as they tend to have some social awkwardness about them, like not welcoming people into their space, *stealing children and leaving changelings, and the like. The long and the short of it is, don't tick off a faerie if you know what is good for you. Come to think of it, the same can be said about me* at times (checks quickly over shoulder for wings....nope).

*not the stealing children and leaving replacements bit

I had a lot of fun with faerie folk this week. I finished my wee faerie theatre, which was quite enjoyable. 


The plans called for making my own faeries -yaaaaa....no. After a couple of false starts trying to make a passable faerie (my sculpting skills just aren't up to snuff this week, or any other tobacco product you can name, for that matter), I gave it up for a bad job and wandered off to the model train store, in search of suitable people (in this case, HO scale). Happily the good store owner did have a couple of choices, one of which was a box of 24 unpainted people, which was perfect. I very carefully painted little dresses on the gals, and a more respectable male faerie outfit on the lad. I was originally going to have the ladies only dancing, but the fellow kind of looked to me like he was sitting on a mushroom, so I painted him as such. I let the acrylic paint dry, and then applied glitter (mmm, glitter), wings, and hair. The hair is just a tiny little piece of bunka thread, unravelled and glued. It gave a rather wild look to the folk, which was perfect. A few butterflys, landscaping, and voila! 

The Theatre, finished. The faerie folk are a bit tall, but you have to remember that the audience will actually be by small children seated on the floor looking up into the box, so  - from that perspective - everything is peachy keen. I think I will build a little box around this, and add the various little toys and such that I have collected over the years (including that kitschy marionette I bought at the show). 

While I was wandering about looking for a good way to make the faerie folk, I came across an interesting practice called "captured faerie in a bottle". It is like "ship in a bottle", but with way more girly additions, although the challenge of building in an enclosed space remains. This video is by Jennings644 - she has a number of videos, and it is worth a look around as she has some very great tutorials.


Having new knowledge of something hitherto unknown to me but now inciting a burning desire to try, I decided I wanted to capture a faerie folk of my own. There is a method to capturing a faerie, from what I have seen. They are attracted to sparklie bits (once again checks over shoulder for wings ... still no, sigh). They seem to like a lot of lace, pearls, flowers, and jewels. They like their privacy, so the faerie trap needs to have some seclusion - once again, don't tick off a faerie. 

I found these bottles at the craft store, but one can go searching in discount shops, etc., for glasswear, or you could even use clear plastic bottles as long as you can see in them, and you can easily get in the top. I liked these little bottles because there were 4 of different sizes, and the cork in them is easily removable, and they were a dollar. If you have the perfect bottle but no lid, no worries, one can make one and camouflage later. 


The bottle, in which has been added glue and decorative sand. I chose a lovely white sand with a sparkle to it. It took a long time for this to properly dry - at least over night. I found this out the hard way when I went to pop in the faerie stone and faerie, only to have the poor darling sink. Please, treat your faeries kindly! The piece of paper  in the top was a makeshift funnel, so sand wasn't getting everywhere.


A dramatic close up of sand. Looks like salt from this angle, but it is sparkly decorative sand. I found it in the gardening department in a large craft store, packaged in a bag which was not resealable so I had to transfer what I had left into a plastic storage container - they must think I am going to use the whole bag at once, which is silly. 


 Most of the faerie traps I found had some sort of background, which was "modpodged" (aka glued) to the bottle or jar. I found suitable picture, modified it for size, and sprayed it with a varnish so the colours wouldn't run when I glued it to the container - that part is very important, lest you  get a mucky Monet when you were aiming for fantastic fantasia.  This picture was pretty much the last one my printer spit out before it coughed, sputtered, and gave up the soup. This might hamper my future plots a little, we will see. The faerie was also supposed to be printed up - two copies, one a mirror image, "fussy cut",  and then pasted together.  I had a lovely fairy all picked out before  the sputtering effect noted above occurred.

 The bottle, with the sized printing glued in (trimmed as well). This, of course, is not a new idea - I seem to recall making a broach back in my sordid Girl Guide days out of a glass lens and wrapping paper in much the same manner. It is quite a lovely effect.  


This is a cool little faerie tree. Again, my new favourite YouTuber Jennings644 has a tutorial as well (see below). I made mine considerably smaller, but it is just so pretty. 


Simple, right? Make sure your wire is the "wrap" variety - memory wire will be useless, because it will be trying to snap back into shape. The wrap wire is fairly mallable and forgives many twists. 

I kind of like how sparkly this picture turned out - job hazard when you are working in glitter, I suppose. I painted her the same as I did the faerie theatre performers, but over a blue dress I added purple glitter, to give it an interesting texture. The wings of course are glittered. The head piece is a tiny piece of chenille or <???>, which came with my theatre kit.  One could make her a little head piece out of wire and beads as well if one couldn't find the mystery fabric. Again, the hair is a single strand of bunka. 

A slightly more clear look at the faerie above. 

On to the jar! As per Jennings644's instructions, I applied lace, beads, flowers, and trim until I fell into a diabetic coma. Once again, to make an appropriate trap, you have to make it appealing to the faerie's general love of all things beautiful. I did use a glue gun for this step, as it is just less hassle when applying laces etc. to a glass jar. Use the hot glue sparingly, however - very little just to tack it to the jar is all you need, otherwise you fight off little gossamer glue webs for the rest of the day, and the faeries won't like big globs o' glue in their new home. I certainly wouldn't.

Some of the lace, beads, and dangling bits applied - kind of looks like a dalek in a wedding dress, but never mind.  I went on to apply more of the ribbon with the beading, and added more of the silk roses with the sparkly centre. Again - think "DIABETIC COMA". The more frippery added, the more your faerie will feel at home, and the longer she will be inclined to stay.

Time to start adding to the interior of the bottle! A nice little jewel to sit upon. I did make up some mushrooms, but I felt that this trap called out for more bling, as the faerie I wished to attract is less earthy and more flashy. Mind you, I have 3 more jars to play with, so the mushrooms will be part of at least one.

Miss is now in place on her jewel, the tree behind her. Again, I didn't like the greenery and such, this little faerie just wanted sparkle - I added some beautiful glass seed beads near the main jewel to add some visual interest. 

A slightly better picture of the above. One could also create a mermaid this way - wouldn't that be neat? Even neater would be to add a non-water based liquid (so as not to dissolve glue), add sparkles and a stopper that won't come out, and have themselves a tiny little underwater scene.

Many of the captured faerie bottles seemed to have a charm added to the top, which gives it just an extra bit of oomph. I made a nice little charm out of the seed beads, the wrap wire, and some lovely baubles I had originally bought for my faerie to alight, but unfortunately they didn't want to fit through the top of the bottle and I had to use a different jewel. 

There is the completed bottle, front and back. Near the end I went mad and added bits of fern and more flowers as well.  Eventually I will need a little collection tag to go on the side, for authenticity of the collection - very scientifical, your average collection tag. 

It was a fun project, I must say! Of course, if by some strange quirk of the universe this project doesn't float your boat, certainly one could do a more mainstream type project (in the correct scale), use a smaller bottle (a tiny medicine bottle, for instance) to make something for display in a 1:12 scale house, etc. You could go off script completely, and maybe do a Doctor Who themed scene, with the Tardis trapped with the Doctor (hmm, maybe not, there is one thing you don't put in a trap, and that is the Doctor, as below). 

Still, I need to pay homage to 11 before he shuffles off and regenerates at the end of 2013 - decisions, decisions. 
 
Or, you could really go off script and do a Star Wars themed bottle - put Admiral Akbar inside and see which one of your clever friends falls from their chair laughing in glee.   PS: for those rare non-ST fans - and there are a couple out there, believe it or not, and one or two who didn't even watch the movies (gasp!) for whatever insane reason - this is a reference to one of the greatest Sci Fi movies ever made, and a very popular internet meme indeed...


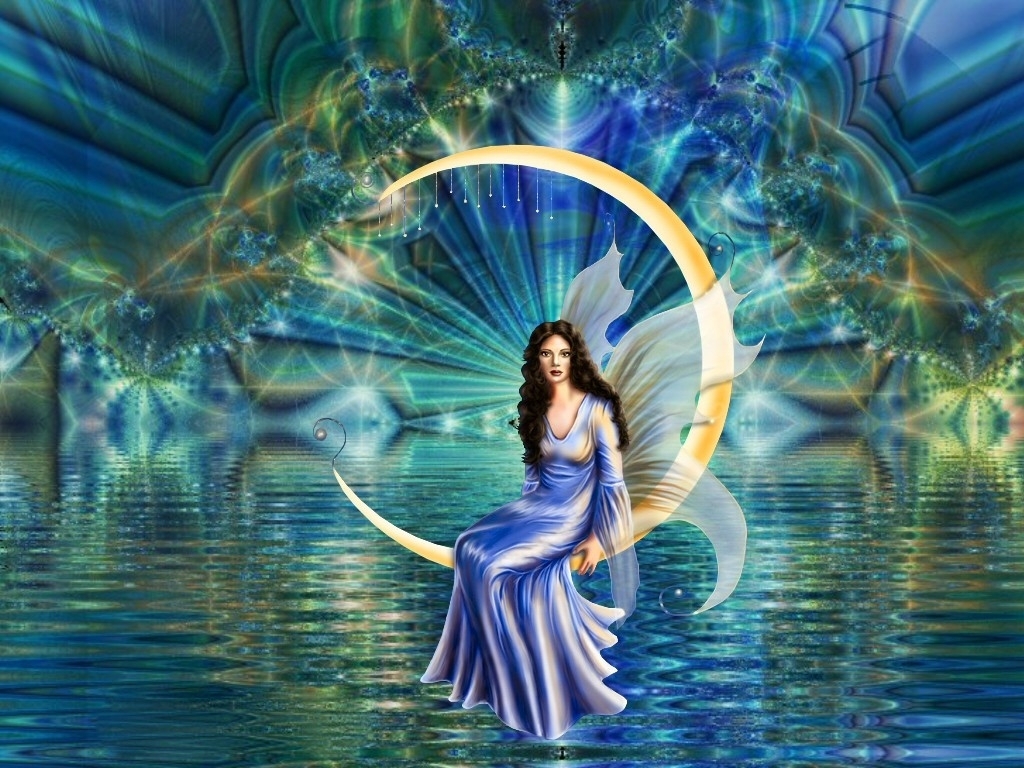
Okay, fine, that one might just appeal to my sense of humor, but you get my meaning - anything goes.  I will leave you with a very beautiful captured fairy video that I came across ...


Until next time, my friends! Remember, be a responsible faerie trapper, label your bottles, and enjoy the last days of July!


Sunday, 14 July 2013

How Wars Begin


 This guy sums up my week. I have been assured that every work site has these people - you know the ones, the sneaky, the manipulative, the inconsiderate, the clueless, the bordering on psychopathic  with the Napoleonic complex - that seem  to have one thing in common - they are totally oblivious to anyone's concerns but their own. They will be your best friend when they need something, but otherwise you are just a little more useful than toilet paper, and if you are in the way one day - prepare to be flushed. Oh, how I wish I could suffer these fools gladly, but sometimes they just get to me, and I become just about as safe as pouring acid on water (N.B. - do not do that!). I wonder if they are just there precisely put in place to challenge the more sane workers ...maybe it is the universe's way of saying "what, you are BORED? Well, have I got a nemesis for you!" 

Personally, I would rather be bored. Too bad there isn't a cure for boorish behaviour - lobotomy comes to mind, although then they can justify taking extra sick days and you just end up covering for the bums. As I say, the infestation is everywhere, so I guess what ever makes me stronger doesn't kill anyone.

Happily, I get a full week away from "them" again -  a whole week, can you imagine? Escape! I thought I would run away with the fairies today (sadly, once again, no blue police box shaped time machines have appeared, so I will make due with what I have) , and I started my Victorian Fairie Theatre. 


This combines a couple of my favourite things - whimsical fairies, and Victoriana. It is a design by Jean Day . She does some lovely little kits in 1/4 scale, by the way, and very detailed they are, and she generously also has some DIY free patterns on her site. The was not a kit  available on her site - it was actually a work shop she held years ago (2007, long discontinued), a closed workshop and limited kits made.  One of my clubmates brought hers for show and tell, and of course I had to have it, so I may have done a little undignified grovelling/pleading/begging until she got fed up and she made a wonderful exception for me! I ended up putting it to the side, and have been thinking about it intermittently for the last few months (I tend to be a collector of kits, rather than a builder of same, but I am trying to get help for that). 

As always, we start by looking at all the lovely bits. 


Bags and bags of lovely bits! Even down to the supplies to make the wee fairie folk. 


A little bit of a puzzle. This reminded me of a couple of reality shows I have been following and have followed. One was a Handyman challenge, where contestants were given raw materials and told to "build"- no patterns, just using their own handyman ingenuity. Another, a baking contest, would give vague  instructions  - which meant one had to fill in the blanks and rely on their training. This project was a hybrid of the two. Included in the pile was the theatre proper, and also an insert that sat on a shelf. It took a little creative thinking to figure out which bit went where. 


  When building something blind like this, it is best to dry fit, and something that is handy is painter's tape - it won't ruin the finish on the matboard pieces (if you are careful, of course - there is always some joker in the crowd that will have a horror story, so I cover my bases). 

Okay, so I have a box put together...


Hmm...a piece left over. There are always pieces left over, right? No? Well fie. Back to the drawing board. 

Okay, I have the shelf and the main structure figured out, and also the insert. Time to take it all apart again and deal with the insert. 

I used the background pictures as a guide, which was handy and brilliant, if I do say so myself. 


Since the insert has to fit inside the theatre as nicely as possible, I enlisted the help of a jig I bought 20 years ago, which has a metal base and wee magnets. As I did need a specified value of accuracy here, I let the glue dry for a change, and took a short ice tea break.

 
Yum, freshly brewed rose ice tea....mmmmm. Doesn't that look good!

 Adding the second insert wall. Looking pretty good!

 The fabric panel, which I have freshly cut out. It is printed on a silk, and quite beautiful. 

 I wasn't happy with the original cut out that was drawn on the front theatre panel, so I used my silk panel and redrew, and the window was excised ever so carefully. 

 One of the walls being glued in place. 


The theatre from the back, pre-insert, fully assembled and glued and - the best part - no extra bits left over!

 The front of the theatre, with the stuffed lower panel. 

 The insert, partially done. This workshop had some lovely transparencies with butterflies, and instructions how to make more dimension in the theatre. I have many more to do, but I was starting to feel impatient and that is always a good sign that one needs to put down the glue and walk away slowly. I will work on it tomorrow I think, and finish it up, make the little fairie folk, and maybe add some landscaping inside to give the stage a little more interest. 

That pretty much covers my day - In case you were interested in making a nice little fairie cottage for yourself, I found a nice little video that shows how to make a cottage out of one of those dollar store type bird houses (or craft store bird houses). This could be a nice little summer project, and it is something that can use up your "not quite in scale but I am not about to throw away" stash.  *Warning: this a bit of a glue commercial, but still a handy little tutorial! You might be able to find a number of wee fairie folk at Michaels (in the Toobz toys). Don't forget to put out a little milk and bread, stay out of suspicious rings of fungus, and until next time we meet, stay safe my lovelies! 


Sunday, 7 July 2013

Feeling' Hot Hot Hot!


July is in full swing now, or so it seems. To late to take it back either way,  since we have already taken it out of the box and have been using it.  Here in the Okanagan, we have been having a bit of a heat wave, which we haven't seen in the early part of July for many years. This, of course, means that people who aren't at the beach  cooling down are are hiding out in their houses, with the air conditioning cranked, usually to the point where it is so cold that the penguins in the house are heard to say "oh come ON now...".  What, you have no penguins? Shame. Anyway, I have never really understood the need in this city to over-refrigerate. Granted, we are technically in a desert and it can get up to 40 C (104 F), but as long as you aren't being foolish about it, it is survivable, and it is not like it will last forever. Comfortable is nice, I won't say I don't appreciate a certain coolness when I am trying to sleep,  but trying to recreate with the air conditioner that early January day when it was so cold your lips froze off seems a little excessive. Maybe it is because I was not raised with air conditioning, so we tended to tough it out. Or maybe as kids, we tended not to care, we were too busy building forts, swimming at the local pool, riding our bikes, falling off things and breaking stuff (like arms and legs) etc., so that the heat was only a minor consideration set afloat in a sea of activity. Either way, it is July. 

I didn't get to much this week - I am living in chaos at the moment myself  - summer is also those times when people want to do home improvements. The problem is, if you move stuff you have been working on so it isn't in the way of the big sweaty workers,  your stuff tends to sink gently back into your craft room, and out of the realm of mortal man. I did try to get a few things done though. I didn't get a chance to start my beach hut yet, just doing a  few kitchen pieces for the Washtub. 

 I have made my 3rd sink. I am not sure what that means. I did change the dimensions a tad, and it is now shorter.

 Sadly, I decided it wasn't quite right, after all that work. The space is simply too small for these big sinks, and I went on to making an L-shaped cupboard and sink. 

 This is one of my earlier sketches today. I have modified things a bit since then. It is always a good idea to make a quick sketch, if only to solidify in your mind where you are going, and it is also a good idea to figure out your dimensions. Also, if you can't put things in their places in your imagination, the internet is your oyster - great ideas can be had by a simple search.  I used a few of the techniques in the Broadwood books and a few internet gems,  and went from there. 

 This is one of my earlier tries, and I was getting the feeling for what I was going for here. Never be afraid to make or toss away something that isn't working. This one didn't work because I still couldn't work my sink in, and this ended up being too long anyway. 

 Eventually I got to this configuration. From here, I  did the usual folding and pasting. 

 There is the sink, pre-paint. I also made the fridge, which was just a taller version of the stove. Today was a day to branch out from the established patterns, I suppose. If you don't believe me about my using cards for source material, you can see I have, as there is someone's hand written greeting in various shades of chopped up.

 The fridge, before I folded and glued. Fridges are easy, they are big boxes with doors. I guess in that respect cabinets are also easy, little boxes with doors. Come to think of it, lots of things are just boxes with doors. Makes life just really simple sometimes.


I went with a lighter palette, because the room was so dark that dark furniture quickly disappeared. I kitted out the appliances etc., with "gold" beading eyelets, which I trimmed with my trusty pair of wire cutters. 

 A view the stove (middle) and the little cabinet on the side - although I wonder if I shouldn't make that a tall cabinet instead? Hmm, something to think about. I will be doing some cabinets for above the sink and such as well, I just haven't gotten there yet. 


The room with a table. I will  have to figure out a better table, something a little smaller I think. The rug will be something different as well, it is far too "expensive" looking to be in the kitchen. 

 The room with my nice little green hutch. Sadly it doesn't really go. Oh well, the good news is all these pieces of furniture will be ready for future projects. The sink needs a little something, I will have to work on that as well. 

As I say, too much chaos, not enough time to find my supplies, so I left it there for the week. 

By the way, What *ARE* you doing still inside? Go, get some fresh air! Winter will be back all too soon (and less than 6 months to Christmas, you know!). Okay fine, so it is winter already in some parts of the world. You know what I mean. Warm now, cold very soon.

To leave you with something summery and fun, I found this little tutorial on how to make poly-clay ice cream from Sugar Charm Shop, so your mini-folk can cool off!  Hope you enjoy it - make safe and sensible choices this week out there in the heat, but also have fun! Until next time, my dear little near-nudists escaping the heat...


Monday, 1 July 2013

Oh, Canada!


O Canada!
Our home and native land!
True patriot love in all thy sons command.
With glowing hearts we see thee rise,
The True North strong and free!
From far and wide,
O Canada, we stand on guard for thee.
God keep our land glorious and free!
O Canada, we stand on guard for thee.

Well, most of our national anthem, anyway. This is the version I sang in grade school, before they changed the morning routines to reflect that no one ever remembers the words because no one will ever leave the song alone - every once in awhile some politician or politically correct lobbyist group gets together and adds/deletes/changes our national anthem, so what I sung when I was 10 is not what they are singing now. Most Canadians get used to humming the national anthem after awhile. 
 
You might have guessed, it is Canada's birthday today - 146 years young! Well, 146 years since we officially signed the lease, anyway. My family has actually been in this country since the 1700's, and is counted amongst the the first settlers of New Brunswick. We liked it so much, we were determined to stay, even when the British decided to round us up and ship us south - something to do with us refusing to sign loyalty agreements or some such. Come to think of it, I still do that, and have gotten in trouble even now, so obviously being a real pain in the butt comes naturally to my genetic line. As you might have noticed, I am still here - apparently the British who locked up my ancestors overlooked the fact that a) their forts were built on fairly easily shifted dirt, and b) my ancestors were by and large farmers. You might have guessed, then, my ancestors tunneled out under the fort walls, headed up the river with the help a friendly native tribe, and settled in for the long run, to be Canadian and Canadian only.

As Canadians, we have a lot to be proud of, as we have contributed much to the world. Superman, for one - he is a Canadian invention, and that is the real reason he is the most polite superhero you are ever going to meet (I suspect his fortress of solitude, located "somewhere in the deep north", has a small hockey rink and he invites off duty super friends up there for the occasional pick up game). Also, the telephone - Bell was in Canada and it was patented in Canada first so technically Canadian it is  -  you don't see many without a phone of some sort plastered to the side of their face nowadays, which shows you what kind of contribution it really was (Our fault, folks, sorry.) Medical advances like Insulin (Banting and Best) changed the face of Diabetes into a somewhat treatable disease, instead of an automatic death sentence. This is but a few examples - we have lists and lists of things we invented -  we will also take under our wing other things as well if we can find proof that a Canadian was involved in some way (e.g. A Canadian helped develop the show Doctor Who, so ergo - we claim it, etc) , but that is a different discussion for a different day.  Also, about half of Hollywood seems to be populated by Canadians - Bill Shatner (Captain Kirk), Dan Akroyd, Jim Carrey, James Doohan - a small list, but the list goes on. We seem to drop a lot of comedians on the poor unsuspecting Americans as well - I say poor, because Canadians have a fairly strange sense of humor, if you haven't noticed. Like us unleashing a certain boy-man singers with the initials J.B.  on the world - Sorry for that.  Oh yes, the apology - we are big on those. However, it has been said that we are constantly saying we are sorry, but we never actually apologize.

Anyway, in the grand tradition of Canada, the great "tossed salad" of the North American Continent, I make you all honorary Canadians today and you are all invited for cake (which we probably invented ... )


  So, now that I have my yearly bout of country pride all said, what have I been up to this week? Well, I bought myself a pair of glasses. But not ordinary "hipster-looking" glasses - these are reading glasses with a surprise....

 Everyone sing! You...You light up my liiiiiifeee... Yes, they have little Borg lights! I have been wanting a pair for awhile, and I found some at the local drug store. My mag-eyes are great, but sometimes you need a little light on the subject. 

 Work continues on the Washtub. I have installed the upstairs partition in this picture. I did have to slightly trim it down, because it was too tall - I think a lot of that has to do with the way the walls were treated, and that there was some unexpected warping here and there. I have glued the back roof on as well.

Here is the wee beast, all put together. 

A top view with the front removable roof removed. Note I have put in the false door. 

Again, with the warpage I found the front of the house was not quite meeting up on the sides. I camouflaged it with a nice wooden trim. I quite like how it looks. 

 This is the removable front, on the back side. I have framed out my windows, to make it look a little neater. 

I have roughed things up a bit. I probably will add some curtains, and fix the odd paint splatter. Other than that, it is done and ready to be decorated! Too bad I am remaking a lot of the furniture because I thought most of this would be designed to go into the house anyway, but C'est La Vie, as they say.

Thought I would give the range cooker a little try. I wasn't fond of the look of these with the burner covers, though, so I said "tough for the mini-cops, I am leaving them off!" 

The usual start, drawing the pattern, scoring and cutting the thing out. 


The front oven doors are faux doors, glued while the whole thing is still flat. The metal doors are actually little eye rings that I had for beading, which I clipped carefully with my wire cutters. Next time I will leave these off until after painting, because they just kept pinging off and I couldn't keep them shiny. A wider tweezers is also recommended, the really fine ones couldn't seem to hold the thin wire well.


Once the stove was glued, then I was free free FREE to start adding the top and the bottom, which was the standard "glue to the sheet of paper, trim carefully around the box." There are other ways to get a more accurate look, I suppose, but after practice you can get pretty good at eyeballing things in this scale. 


There is the wee stove. It is starting to look like something at this point. Next was to add the eyelet to the top, and the chimney, and paint. 

The wee stove, painted up and ready to rumble. I am going to leave it simple, I think. I want to make a kitchen set to match this, and manipulate a few patterns so things look a bit more in scale. Hopefully by next week I will have a kitchen to show. I am anxious to get on to my next project, which will be a beach shack, or possibly whatever floats my boat. 

Either way, I think we need a fancy coffee after a job well done. I found this tutorial that uses various bits and bobs to create a rather interesting Cappucino machine. I do level the caveat, however, that this tutorial is done by a young mother, and her child is clamoring for attention in the background/leveling the place while mom is desperately trying to explain  how to make the coffee pot, so it is half tutorial, half crashes and screams -  if such things make your teeth itch, it is best to watch with the sound off as much as possible. 


Have a great Canada Day, and until next time, my friends, have a safe and careful week. 


PS: Happy Birthday to our Neighbors to the south, who will be celebrating shortly their birthday as well!